Last updated on
Learn how to build a porch roof step-by-step, creating a cozy outdoor space with the right tools and materials.
Ready to transform your porch into the envy of neighborhood gatherings, the sacred potion for coffee lovers, or simply an oasis for your summer suntan plans? Building a porch roof is like crafting a homemade pie—start with a solid foundation, follow the recipe (aka, codes and building regulations), and use the right blend of tools and ingredients. We won’t leave out a single secret ingredient, so hold onto your hammers. This guide will equip you with everything from the topping shingles to calling in the pros, ensuring your roof project is the talk of the porch.
Key takeaways:
- Consult local building codes before starting.
- Use weather-resistant materials for durability.
- Measure twice for accurate cuts and placements.
- Secure support posts firmly in concrete.
- Always prioritize safety with proper gear.
Codes and Regulations
Embarking on a porch roof project without consulting your local building codes is like baking a cake without checking if you have eggs. Both could end in disaster. Building codes are put in place to ensure safety, aesthetics, and functionality.
First, check the height restrictions. Porch roofs too high may unintentionally invite the neighborhood birds to hold weekend brunches.
Next, consider the setback rules. These regulations ensure your porch doesn’t cozy up too close to the property line, preventing awkward small talk with neighbors over the newly built wall.
Load requirements dictate how much weight your roof must support, which is crucial unless you fancy it collapsing under a snowman’s weight in winter.
Lastly, permits can be tricky. Secure one before you swing that hammer. It’s your golden ticket to avoid future legal headaches.
Remember, these regulations vary based on location. You wouldn’t wear swim trunks to a snowstorm, just like you wouldn’t use Florida codes in Alaska.
Safety Considerations
Always remember, roofs can be sneaky. They might look innocent from the ground, but up close, they’re like a mischievous cat ready to pounce.
Consider the weather; working in windy or rainy conditions might turn you into a kite. Secure ladders properly, because gravity is unforgiving. Make a pact with gravity: you’ll stay upright, and it stays constant.
Invest in sturdy gloves and safety goggles. Hands and eyes aren’t as replaceable as shingles or nails. Use a harness if your porch is more empire state than bungalow.
Lastly, keep tools organized and out of your immediate clumsy zone. No one wants a flying hammer incident. Stay safe, and may your porch roof endeavors be as flawless as a pancake on Sunday morning.
What You’ll Need
Get ready to embrace your inner craftsman—or craftswoman—because we’re talking tools and materials! First stop: your friendly neighborhood hardware store. You’ll be on a first-name basis with every aisle attendant in no time.
Grab some weather-resistant lumber. Think of it as the tough, no-nonsense guardian against rain and sun shenanigans. Galvanized nails are a must. They laugh in the face of rust. Cement bags will ensure your support posts are rock solid. Don’t forget roofing felt and shingles; they’re like peanut butter and jelly, making sure water stays out of your porch’s party.
Equip yourself with a hammer, circular saw, and a level. The level will earn its weight in gold with each aligned beam. And, of course, a drill is mandatory—because, let’s face it, doing all this work with just a manual screwdriver is for superheroes.
It’s a fairly extensive list, but remember: each item is crucial for a secure and long-lasting porch roof. Make sure you have some extra measure of patience and a sprinkle of humor in your toolkit. You’re going to do great!
Equipment / Tools
Ready to channel your inner builder? Here’s your trusty toolkit lineup. First, grab a tape measure. It’s your best friend in this fashion-forward world of angles and inches.
A saw is essential, so choose your weapon wisely; circular, hand, or miter, the saw world is your oyster.
Keep a power drill handy—think of it as your magic wand for poking holes and screwing things up, in a good way.
A level is crucial; we want a porch, not a ski slope. Don’t skimp on safety goggles unless you enjoy squinting dramatically while dodging wood chips.
A hammer, of course. Perfect not only for nails but also for stress relief.
Lastly, a pencil. Yes, old school, but perfect for marking who’s boss on your lumber.
Now go forth, and may your porch roof journey be smooth and splinter-free!
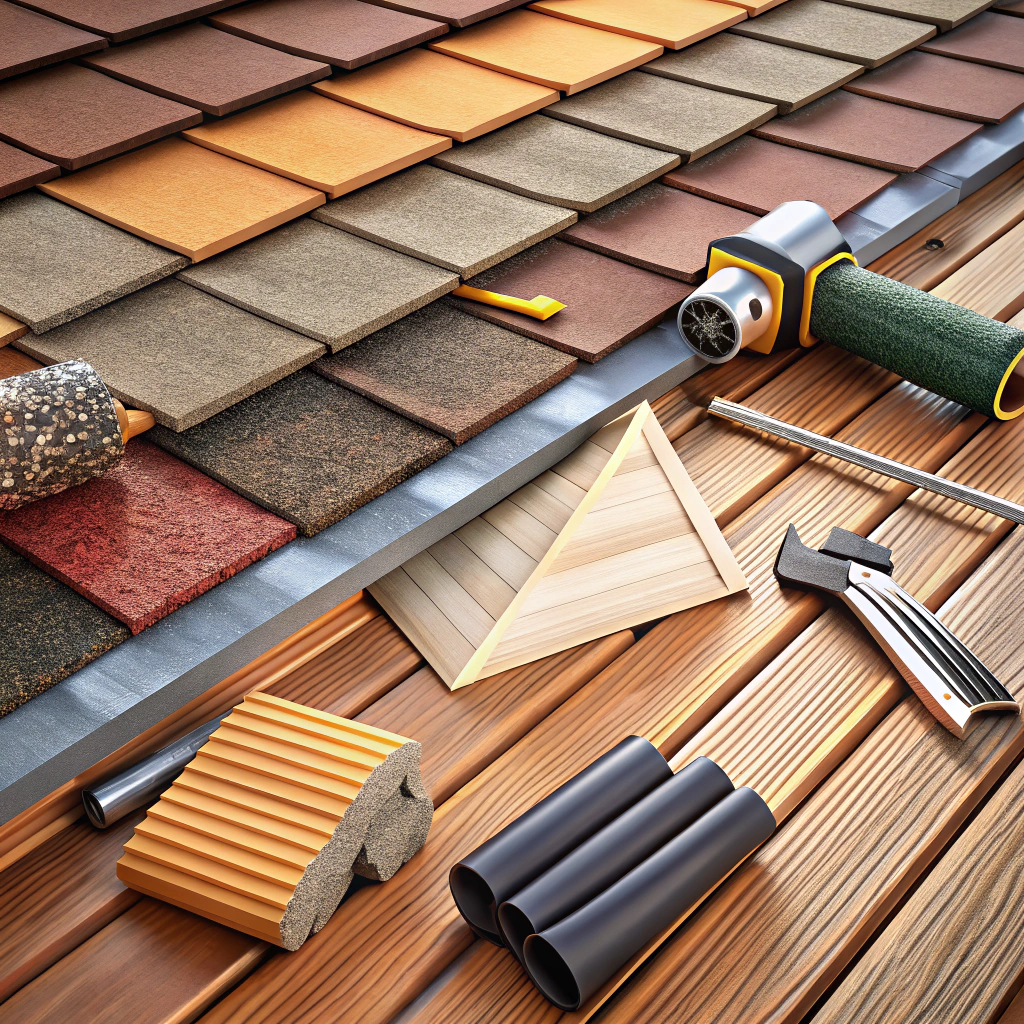
Materials
When embarking on the porch roof adventure, it’s crucial to have the right materials. After all, you wouldn’t build a gingerbread house with Play-Doh.
Firstly, you’ll need lumber for the framework, typically pressure-treated wood to resist those pesky little things called bugs and moisture. Common choices are 2×6 or 2×8 boards, which are as ubiquitous as dad jokes at a family barbecue.
You’ll also require plywood or oriented strand board (OSB) for the roof decking. This provides a solid foundation for your roof covering and gives your porch roof a stable backbone—it won’t have second thoughts about its career choices.
Roofing material is next. Asphalt shingles are a popular choice because they’re tough against the elements and come in more colors than you can shake a paintbrush at. If you’re feeling fancy, metal roofing is sleek, durable, and makes beautiful rain melodies.
Don’t forget the hardware. Galvanized nails and screws hold everything together, like glue in a kid’s art project—only less sticky.
Finally, roofing felt and drip edge keep the water where it belongs: outside, not inside, like a soggy biscuit. These humble heroes protect your wood from moisture, adding life to your masterpiece.
Attach the Ledger Board
Ensure the ledger board is level and securely fastened to the house. This horizontal piece is the backbone of the porch roof, keeping everything from going topsy-turvy during your next garden party.
- Choose pressure-treated wood for durability. It’s like the superhero of lumber, fighting rot and decay.
- Drill pilot holes for large screws or lag bolts. Let’s avoid creating a wood splitter saga.
- Use ledger board flashing above it. This is like a little raincoat, protecting from moisture seeping in and causing mayhem.
- Check for structural integrity. Not all houses are created equal; some might need extra support.
Align the board carefully. Measure twice, cut once. Or in this case, align twice, bolt once, unless you’re fond of unexpected tilts.
Install the Rafter Hangers
Ensuring a snug fit is key when placing these magical metal connectors. They’re like the dating app for wood rafters, ensuring they meet their perfect match: stability. Getting the angle wrong is like showing up to a party in pajamas—awkward and ineffective.
- Measure twice, secure once. Position each hanger perfectly aligned where rafters will rest. It’s like aligning puzzle pieces without losing one to the dog.
- Double-check the spacing. Rafters need to social distance—too close, they’re cramped; too far, they’re barely holding hands.
- Use the right nails. Regular nails aren’t the rockstars here. Hanger nails are short and sturdy, like a bulldog ready to hold everything together.
With hangers properly in place, your rafters are now ready to enjoy the strong embrace of their metal companions, creating a robust structure ready to withstand the weather’s whims.
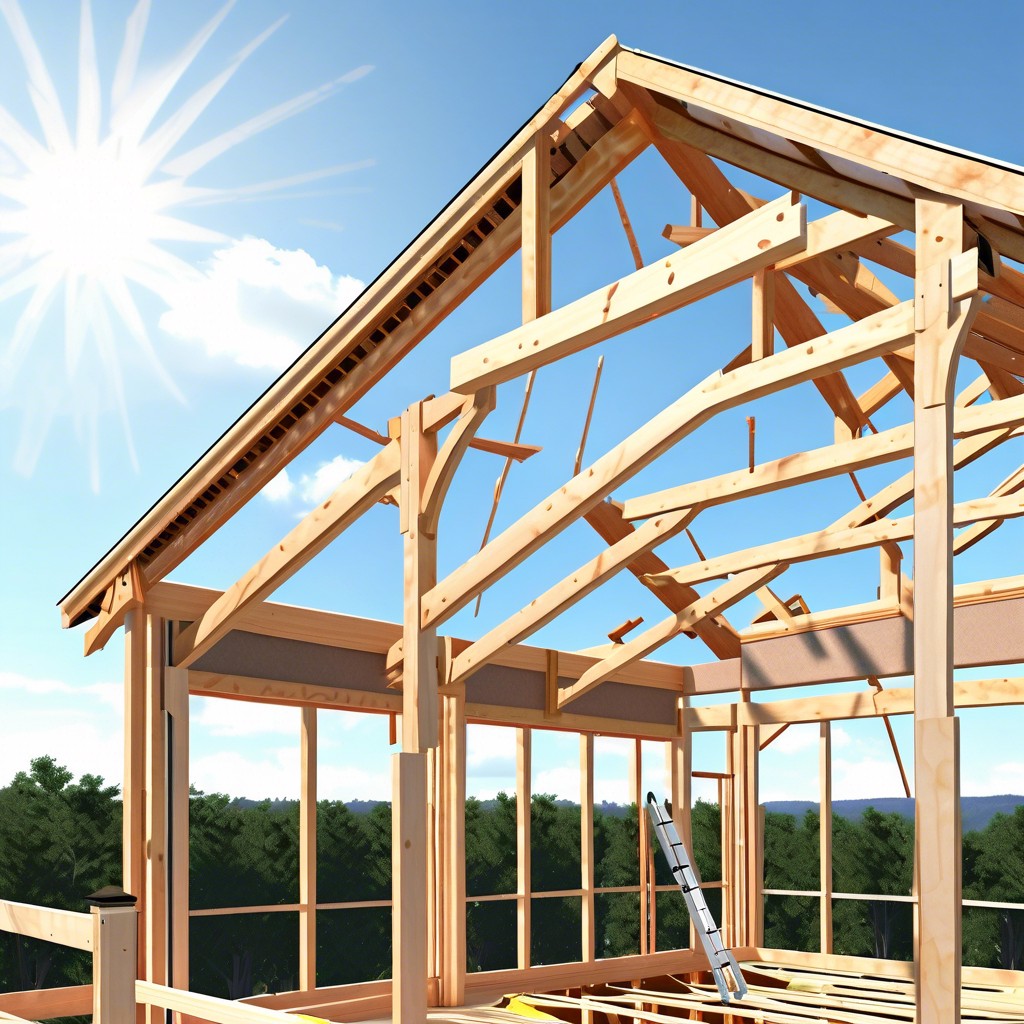
Set the Support Posts
First, measure twice, because who wants a lopsided porch? Locate the spots where the posts will stand. Visualize a support group for your roof, lending it strength and stability, but without the emotional baggage.
Dig holes deep enough to reach a frost-free depth. Basically, dig like a groundhog without a day job. This secures your posts from seasonal shifts and keeps things upright.
Set the support posts in concrete. This step is akin to making sure your in-laws stay grounded during holiday dinners. Level them meticulously; nobody enjoys a porch with disco vibes. With everything nice and plumb, you’re ready to move on to the next epic part of your construction saga.
Notch the Support Posts
Ah, support posts—strong, silent types that need a little finesse. Begin by marking a notch on the post where the header beam will rest. Not a sculptor? No worries, it doesn’t have to be a Michelangelo masterpiece.
Ensure that the notch depth is one-third the width of the post. Any deeper and you’re inviting instability like a wobbly table at a diner. Keep the angle at 90 degrees for a snug fit.
Use a circular saw for the primary cuts and a chisel to clean up. Remember, chisels are like your fun uncle at a barbecue—smooth and effective. Once the notch is cut, check the fit with the header beam. It should sit flush, like a perfect handshake.
Always double-check your measurements. Lumber is forgiving, but not forgiving enough to redefine geometry.
Attach the Header Beam
To get that header beam in place, it’s all about precision and teamwork. Think of it as the sturdy backbone of your porch roof. Here’s how to successfully install it.
First, grab a buddy. This task is a two-person job unless you have the curious strength of a cartoon bear. Align the beam with the notches you cleverly carved into the support posts. It’s crucial; there should be no awkward gaps or precarious wobbles.
Ensure it’s level. Uneven means doom-and-gloom sagging later, and nobody wants a droopy porch. Use a trusty level to confirm its position. If necessary, adjust the posts, not the beam itself—taming wobbly supports is easier than wrestling with the beam.
Secure it with bolts or lag screws. You want this connection to withstand whatever nature throws at it, be it a rainstorm or a curious squirrel with weight issues. Tighten these fasteners properly; handshakes should be firm, just like your connections.
Invoke a quick check for stability before moving on. Give it a little nudge, but no need to test it like a sumo wrestling ring. If it holds steady, you’re set for the next steps.