Last updated on
In this comprehensive guide, you will learn the step-by-step process of hanging Christmas lights on your roof safely and effectively.
Key takeaways:
- Plan your light display and consider the layout and power sources.
- Gather the necessary tools, including lights, clips, ladder, tape, and cords.
- Choose the right clips for your roof type and light compatibility.
- Lay out and attach lights with clips, spacing evenly and securing firmly.
- Safely remove lights after the holidays, label placement for next year.
Make Your Plan
Before embarking on the task, assess the roofline and design a layout for your light display. Consider the length required and the location of power sources. Your plan should include the type of lights you’ll use and the quantity needed.
Measure the roofline and any other areas where lights will be hung to ensure you purchase the correct amount. Take into account the architectural features of your house, like eaves and gables, to determine the best light placement for maximum visual impact. Sketching a simple diagram can help visualize the end result and serve as a guide during installation.
Finally, check the weather forecast to choose a safe, dry day for the installation.
Gather Your Tools
Before starting the installation process, ensure you have the following items:
- Christmas lights: Choose from LED or incandescent bulbs, and make sure they’re rated for outdoor use.
- Light clips or hangers: Select the appropriate type for your roof’s material and design.
- Extension ladder: Use one that extends at least three feet over the eave of your roof for safety.
- Measuring tape: Measure rooflines and the lengths between outlets to determine the amount of lighting needed.
- Outdoor extension cords: Opt for cords specifically designed for outdoor use with built-in GFCI protection.
- Timer or smart plug: Automate your light display to save energy and reduce the risk of fire hazards from overheated bulbs.
- Gloves: Wear them to protect your hands while working with clips and rough roof surfaces.
- Safety goggles: Protect your eyes from any debris while on the ladder or roof.
By gathering these tools and materials beforehand, you ensure a smooth installation process.
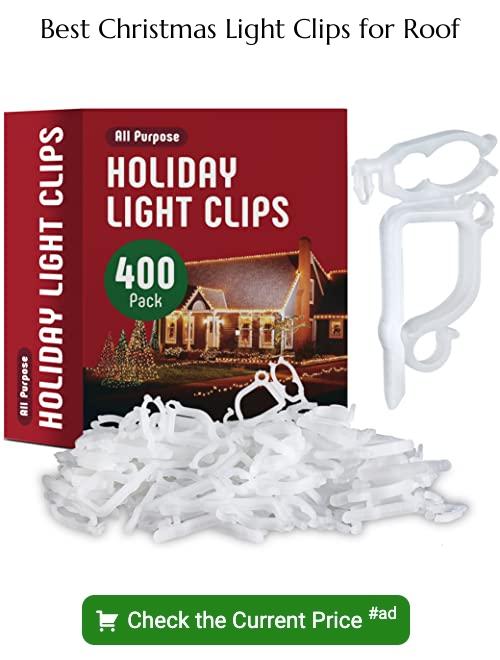
Types of Christmas Light Roof Clips
Choosing the right clip is crucial for securely attaching lights to your roof without causing damage. Universal clips offer versatility, as they are designed to fit most lights and can be used on gutters or shingles.
All-in-one clips also provide flexibility and can often accommodate both C7 and C9 bulbs.
For those with tile roofs, tile clips are specifically designed to attach lights without disrupting the integrity of the tiles.
Icicle and mini light adhesive clips are ideal when a more permanent solution is needed, as these adhere directly to the roofing material.
Shingle tabs fit easily under shingles and create a snug fit for bulbs, whereas gutter hooks clip directly onto gutters offering a straightforward installation method.
When selecting clips, consider compatibility with your lights and the structure of your roof to ensure a safe and aesthetically pleasing display.
How to Hang the Lights
Begin by laying out your lights on the ground, untangling any knots and ensuring all bulbs work.
Starting at the power source, typically near the garage or front door, affix the first clip.
For a shingle roof, slide the clip under a shingle; for a gutter, clip it onto the gutter’s lip.
It’s critical to secure each clip firmly to prevent wind damage.
Move along the roofline, spacing clips evenly—usually 12 to 18 inches apart—attaching lights as you go.
When turning corners or navigating roof peaks, extra clips may be needed for support.
For ridge lines or hips, use clips designed for those areas without excessive force to prevent damage.
Avoid overstretching the strands or pulling too tight, which could cause strain on the clips and lights.
If your roof has unique features, plan your light placement and clipping strategy accordingly to maintain a cohesive look.
Always prioritize safety: use a sturdy ladder, secure it properly, and consider having a spotter for additional support.
How to Take the Lights Down After the Holidays
Wait for a clear, dry day to ensure safe removal conditions and to prevent slipping. Disconnect the power before starting to avoid any electrical hazards.
Carefully remove each clip, gently supporting the strand of lights to prevent them from falling or being damaged. Coil the lights loosely to prevent tangling and store them in a dry place for next season.
Label or map out your light placement if you wish to replicate the design in the following year.
Check for any damage and replace burnt-out bulbs before storage to ease the installation process next time.
FAQ
How do you hang Christmas lights on top of a roof?
To hang Christmas lights on a roof, use specially designed clips, which are easy to acquire and ensure minimal risk to the roof’s structure.
How do I get power to my Christmas lights on my roof?
To power your Christmas lights on the roof, you can either use an outdoor light socket, draw power from a basement, or opt for lights that do not rely on electric power.
What precautions should I take when hanging Christmas lights on my roof?
Ensure to use clips instead of nails for hanging lights, avoid walking on the roof as much as possible, and always have someone to spot you for safety purpose.
What is the best type of Christmas lights for roof installation?
The best type of Christmas lights for roof installation are waterproof LED light strings due to their longevity, efficiency, and safety features.
Are there any specific tools or techniques required for securing Christmas lights to roof shingles?
Yes, to secure Christmas lights to roof shingles, it is crucial to use light clips or shingle tabs that can latched onto the edges of the shingles and gutter clips for the gutters, as well as a roof ridge line clip for the peak of the roof.


