Last updated on
Learn a step-by-step guide to patching a roof and keep those pesky leaks at bay.
When it comes to roof repair, finding the elusive leak can feel like searching for the last piece of a jigsaw puzzle—while balancing on a ladder. Fret not. Whether you’re dealing with sneaky wet spots on the sheathing, rebellious flashing, or vent boots that refuse to behave, this guide’s got your back (and your roof). Ready to patch things up, from vent boot quirks to the secret life of flat roof membranes? Stick around—we’ve even got a maintenance plan to keep your roof from becoming a waterfall in disguise.
Key takeaways:
- Gather materials: tar, cement, scissors, shingles, ladder.
- Inspect for wet spots and leaks in the attic.
- Check flashing for holes, tears, and rust.
- Patch leaks with tape or sealant as temporary fix.
- Perform regular maintenance to prevent future leaks.
Materials Needed
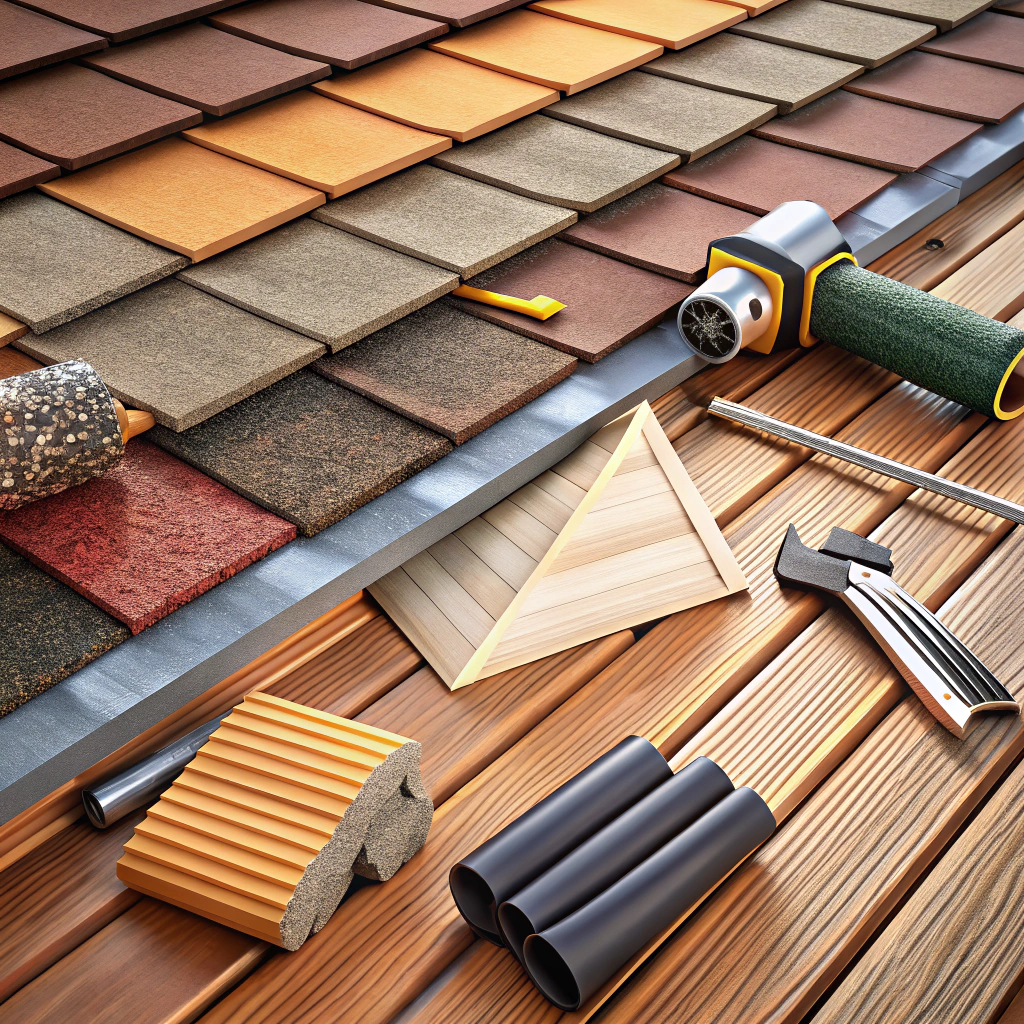
Embarking on a roof-patching adventure? Think of it like a treasure hunt, except the gold is a leak-free roof. Equip yourself wisely.
First, get your hands on some roofing tar. This thick, black goop can seal small leaks faster than you can say “watertight.” Keep a putty knife handy for spreading it like peanut butter.
Next, locate some roofing cement. It’s like tar’s versatile cousin, perfect for sealing seams and cracks. Remember, too much cement is like too much hair gel—just a mess.
Grab a pair of scissors that can take on tar paper. Yes, scissors. Leave your grandmother’s sewing ones in the sewing box.
For shingles, have spare ones in your storage. They’re your Jedi allies in the battle against the elements.
Lastly, ensure you have a sturdy ladder. Because flying is not an option unless you’re part superhero. Assemble these and you’re ready to roof patch like a pro!
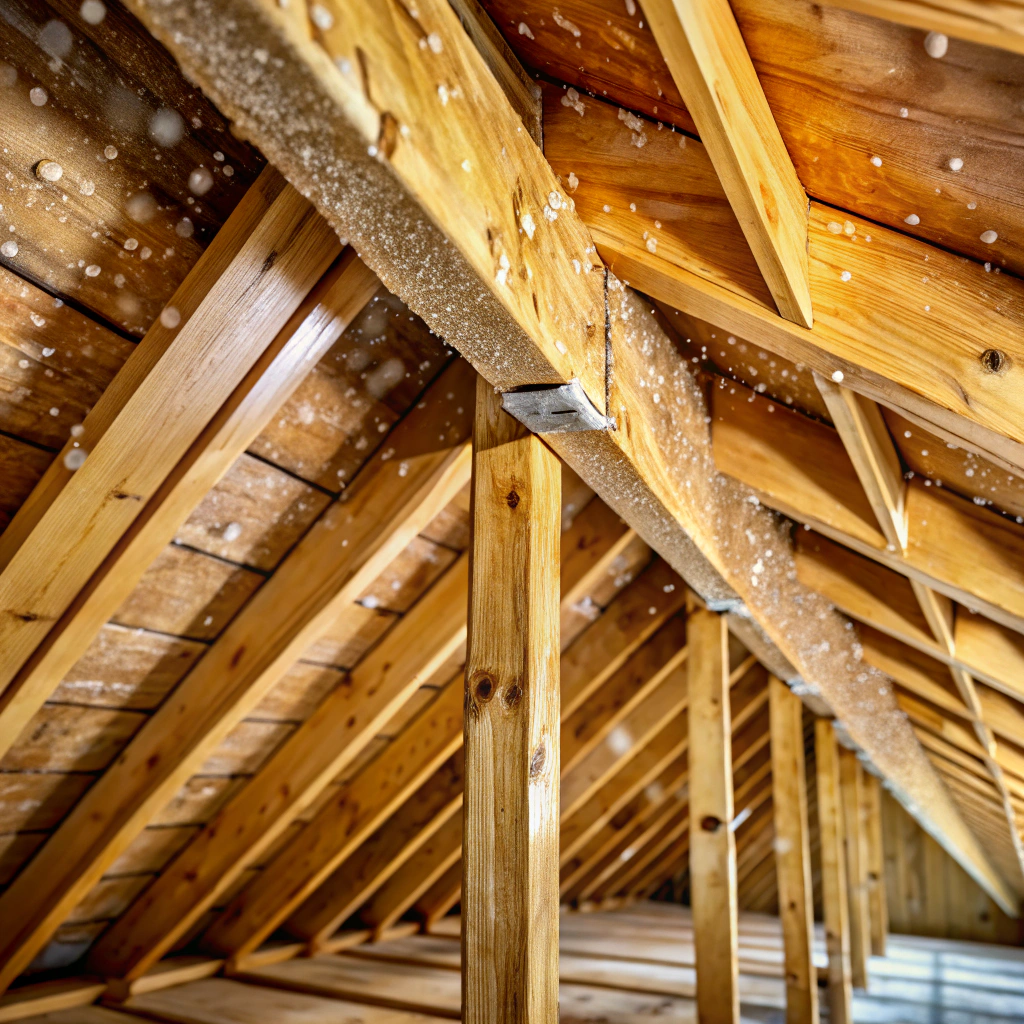
Look for Wet Spots On Sheathing or Rafters
Water has a sneaky way of revealing its presence. It’s a roof’s equivalent of leaving a trail of breadcrumbs. Here’s how to play detective:
Scan your attic like an FBI agent looking for clues. You might spot damp patches, which are the roof’s not-so-subtle cry for help.
Use a powerful flashlight, or pretend you’re on a ghost hunt, exploring every inch. Spooky shadows are a red flag.
Bear in mind, water travels. That leak you found might have originated miles away—or just a few rafters over.
A word to the wise: don’t rule out animal guests. Sometimes roof leaks masquerade as raccoon resorts.
If it smells damp, chances are it is. Follow your nose; it knows things your eyes might miss.
Finding the leak source is like solving a mystery; channel your inner detective and piece together the clues.
Check for Holes or Tears in the Flashing
Flashing is the superhero cape of your roof, directing water away from seams and joints. But even superheroes have their weak moments.
Keep an eagle eye for holes, tears, or signs of rust. It’s like finding Waldo, but with higher stakes.
Look out for:
Uncooperative caulk: If it’s cracked or missing, it’s not on vacation — it’s a red flag.
Metal fatigue: Sometimes, even metal feels tired and starts curling or warping.
Rivets gone rogue: Loose or missing rivets can make your flashing about as useful as a soggy tissue.
Stay sharp and always trust your gut — and your flashlight.
Find the Source of Roof Leaks
Leaks have a knack for playing hide and seek. Just when you think you’ve got them, they’re laughing behind another shingle.
- Start by checking uphill from any wet spots – water loves downhill chasing.
- Examine flashing and plumbing vent boots. Good ol’ water loves collecting on these, like squirrels on a bird feeder.
- Look for roof penetrations; anything that pokes through the roof is a possible suspect.
- If rain is scarce, enlist help from a friend with a hose – watch for the spritz lead to a dribble.
Finding leaks can feel like a detective game—minus the trench coat and magnifying glass. Keep a sharp eye!
Patching From the Inside
Sometimes fixing a leaky roof can be as simple as using that trusty duct tape—if only temporarily. Here’s a sneak peek into the mysterious world of indoor patching.
First, locate that pesky leak. You might have a drip orchestra playing the tune of “Where’s Waldo?” in your attic. Once you’ve found the culprit, grab a bucket. Believe me, you’ll regret it if you skip this step. Next, dry the area around the leak with a towel. Wet surfaces and tape are like oil and water.
Now, call out your inner artist and apply roofing tape or a sealant. Slap it on as if you’re Picasso working on a waterproof masterpiece. For small holes, you could even use a piece of plastic sheeting for added drama. Just remember, this is a temporary fix, not a forever solution; it’ll hold only until the professionals arrive.
Finally, keep your eyes open! Monitor the patch during and after storms. You’re now both the roof detective and its caretaker. Now, wasn’t that an indoor adventure?
Fixing Leaks in the Vent Boots
First, locate the vent boots on your roof. They’re those round lips that protrude like tiny chimneys. Check for cracks or any gnarly signs of wear. If they look like they’ve been chewed up by a raccoon with a grudge, you’re in leak territory.
Next, gently check the rubber boot for stiffness or brittleness. If it’s as rigid as your grandpa’s knees after a two-mile hike, it’s time for replacement.
The nails securing the boot may have started bailing on you. Replace those deserters with rubber-washer screws. These are team players, ready to hold the fort.
If the boot itself is in shape but there’s still a leak, silicone caulk is your new best friend. Apply it where the boot meets the pipe because gaps are not a hard pass here.
Remember, a vent boot replacement doesn’t require a PhD. You just need patience, a steady hand, and a splash of humor—like a ninja plumber with a side gig in comedy.
Repairing the Flashing
Ah, flashing, the unsung hero of your roof. It’s like the duct tape holding your roof together—minus the adhesive and charming silver sheen. This metal marvel keeps water at bay but occasionally needs a little TLC itself.
Inspect for Rust: Corroded flashing is about as useful as a chocolate teapot. Remove rust and apply a primer to keep it watertight.
Seal Those Edges: Use roofing cement like it’s frosting a cake—cover gaps and secure those edges.
Replace, If Necessary: If your flashing looks like it’s been through a roof battle and lost, swap it out with some fresh metal. Think of it as a spa day for your roof.
Reattach Loose Pieces: Nobody wants flapping flashing. Nail or screw the wobbly pieces back down securely, like a dance partner you don’t want to let go.
Cut to Fit: New flashing? Trim it so it fits like an elegant puzzle piece—it’s not a one-size-fits-all kind of gig.
There you have it, you’re on your way to becoming a flashing aficionado. Now go forth and conquer those roof leaks!
Flat Roof Membranes
Flat roofs play by their own rules. They’re the mystics of the roofing world, keeping it all organized with membranes. Picture this: a watertight layer keeping your roof as dry as a desert. These materials often come in EPDM, TPO, or PVC—like a well-dressed party trio, each with its quirks.
EPDM is the rubbery type, best friends with UV rays and time. TPO is more eco-friendly, a green-minded champion. PVC, sturdy and fire-resistant, but occasionally cracks under pressure, much like my resolve in a candy store.
Installing these membranes requires precision. Think of it as laying down a giant outdoor carpet. There’s bonding adhesive, seams to seal, and ensuring no blisters form—roof acne is not in style.
Maintenance means checking for punctures or separations. If leaks appear, patchwork becomes your art. A dash of adhesive here, an EPDM patch there—it’s like crafting a masterpiece. Or at least a collage.
How to Repair a Leak in the Membrane
Alright, you’ve found the sneaky little leak in that membrane—turns out your roof is taking “leaky faucet” a tad too literally. Time to show it who’s boss:
First, peel back the damaged membrane section. Don’t worry, we promise your roof won’t call HR on you for being too hands-on.
Next, slap on some primer around the crime scene. This helps ensure your patch sticks like it’s got a crush on the membrane.
Cut a patch that’s slightly larger than the damaged area. Bigger is better, unless you’re talking about porcupine hugs.
Apply an adhesive generously. Think of it as therapy for your roof; it needs a little extra love to mend the relationship.
Place the patch tenderly on the adhesive. Smooth it out, just like you would do to iron out a wrinkle in your favorite superhero costume.
Finally, roll the patch with a weighted roller. Give it a workout, so it bonds like two inseparable besties.
And voilà, you’ve transformed your roof from leaky diva to a sturdy keeper!
Regular Roof Maintenance
Dust off that ladder and put on your detective hat because a little prevention goes a long way in roof realm upkeep! Think of it as a roof spa day; give it some love and attention to keep leaks at bay.
First, inspect your roof biannually—once just after winter and again post-summer to catch any damage from harsh weather conditions. It’s like checking your wallet after holiday shopping, who knows what you’ll find.
Second, clear the gutters of twigs, leaves, and that mystery object that could be last year’s kite. This prevents water from taking a surprise detour into all the wrong places.
Third, keep an eye out for loose shingles. They’re like caffeine-deprived employees on a Monday morning, prone to slipping off at the worst possible moment.
Finally, trim any overhanging branches. Trees are lovely confidants but lousy roommates, dropping debris and attracting unwanted critters that use your roof as a steppingstone to world domination.
It’s simple: give your roof a little TLC regularly, and it might just reward you with fewer uninvited waterfalls in your living room.