Last updated on
Discover how to repair a roof leak and prevent future drips with simple steps and a pinch of humor.
Got a roof that’s up to no good, leaking like it’s practicing for a role in a disaster movie? Fear not, intrepid homeowner! This guide is your ultimate leak-busting companion. From sneaky leaks that play hide and seek to gutters that need a firm talking-to, we’ve got the scoop to patch up every drip and drop, bringing peace back to your roof. Dive in and let’s plug those pesky leaks together!
Key takeaways:
- Inspect attic for wet spots and mold.
- Check flashing for holes or tears.
- Use flashlight and partner to find hidden leaks.
- Inspect and repair plumbing vent boots and roof vents.
- Clean gutters to ensure proper water drainage.
Look for Wet Spots On Sheathing or Rafters
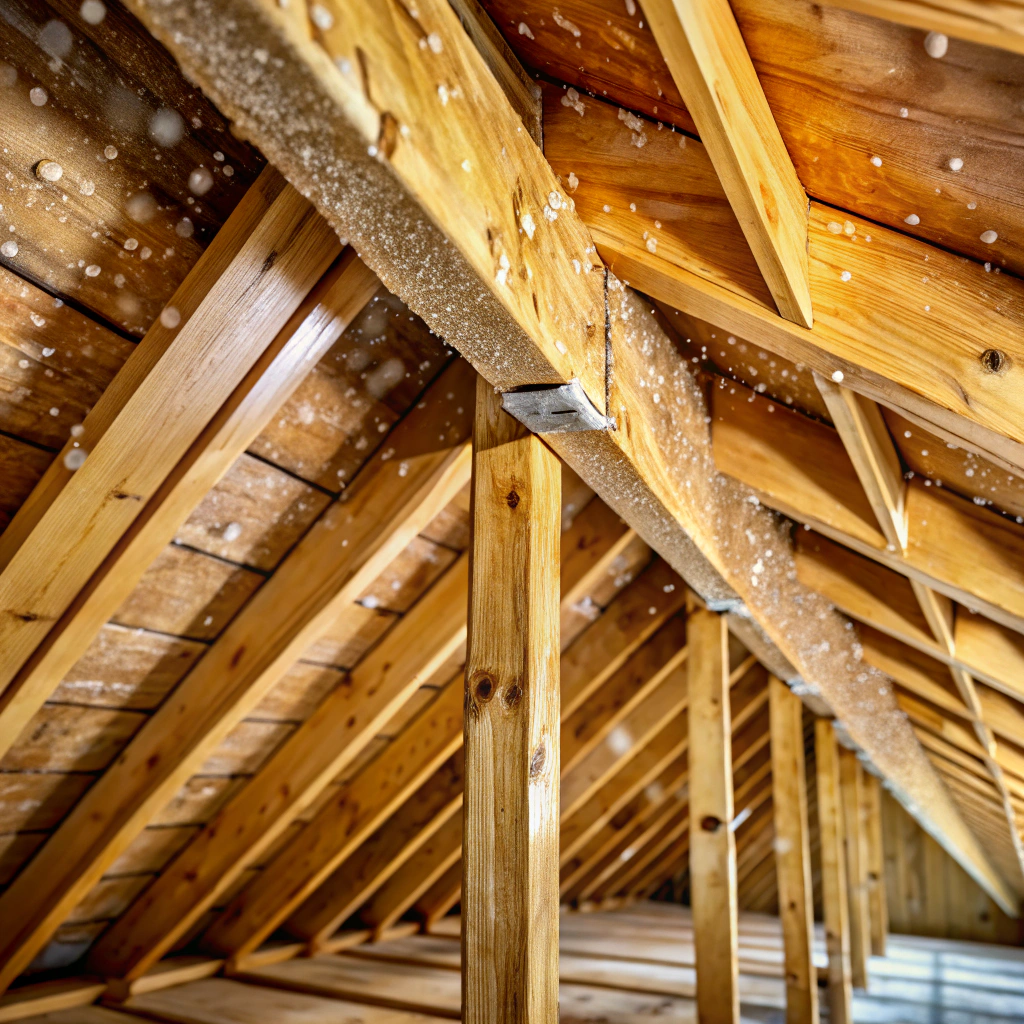
Start your mission by channeling your inner detective. Enter the attic, and prepare for a thrilling game of spot-the-difference. Observe the angles, looking for stains, dark spots, or, God forbid, mold. These are all pesky, uninvited guests.
Use a flashlight to illuminate sneaky spots—sometimes the difference is as subtle as your cousin’s bad haircut.
Here’s the nifty part: water travels. The leak might be over there, but the water ended up here. Mind tricks!
And while you’re at it, give those rafters a squint. They’re like the spine of your roof; you don’t want them turning into soggy noodles.
Check for Holes or Tears in the Flashing
Flashing is like the secret agent of your roof, quietly guarding it from sneaky leaks. If torn or holed, water gets a free pass to take a vacation in your home.
Disguise those leaks by using a waterproof sealant to patch minor holes. For more extravagant holes, replace the damaged section. Remember, keep an eye out for rust too. It’s flashy until it’s not.
Also, examine the bends and edges carefully. Flashing is meant to hug surfaces tightly; gaps invite leaks faster than a toddler to a cookie jar!
Go Into the Attic, If Possible
Prepare yourself for a dusty adventure. Dodging the Dracula-like cobwebs is half the battle. But once inside, let your inner detective shine.
- Bring a flashlight; it’s easier to spot desperate leaks sulking in corners.
- Inspect insulation for sogginess; water loves drama, leaving evidence behind.
- Ignore any attic-dwelling bats. They’re just there for ambiance.
- Look for sunlight; if it’s peeking through where it shouldn’t, you might be onto something.
- Trust your instincts. And your sense of smell. Musty odors are villains in disguise.
Finding leaks here can save a world of trouble. Plus, it’s kind of like treasure hunting, except it’s the leak that sparkles.
Use This Trick to Find Difficult Leaks
When rain transforms into an indoors sprinkling system, it’s detective time. Start with a trusty flashlight and a partner with a hose outside; dramatic noir music optional.
Shine the flashlight along the beams and rafters while your partner plays a water wizard. The water may appear where it shouldn’t and the light will catch the dribbles.
Sometimes water waltzes away from the source before it reveals itself. Look for discolored patches or mold on your sheathing to track its sneaky path.
Mirror, mirror on the stick, where’s the water making us sick? Use a small mirror to peek behind obstructive roof elements. No need for x-ray vision here.
Remember, water is trickier than a toddler at bedtime. Stay patient and follow the trail.
Repair Damaged Plumbing Vent Boots
Time to give some love to those vent boots. They’re the unsung heroes crowning your roof. Here’s how to fix them:
First, scout out any cracks or signs of wear in the rubber around the vent pipe. If it looks like it’s been through a bar fight, it probably has, thanks to Mother Nature.
Next, check around the metal or plastic base of the boot. Look out for loose or missing nails like you’re hunting for treasure – except this booty isn’t fun.
If you spot any damage, swap out the whole boot. It might sound like a big deal, but it’s essentially roof fashion makeover time.
While you’re at it, hammer down any nails that have decided to play peek-a-boo, and seal things up with roofing caulk for a snug boot fit.
Don’t forget your sword (okay, just a screwdriver) for stubborn vent caps. Tighten them up! Voila, leak boot camp completed.
Fix Leaky Roof Vents
Inspect those roof vents like a detective on a mystery case. Start by checking the plastic housing for cracks. If cracks are found, it’s time for a replacement. Nobody wants a crack deal where rain is involved.
Next, examine the rubber boot around the vent pipe. If it’s brittle or torn, say sayonara to the old boot. Replace it with a new one to keep things dry.
Even the screws need attention. Loose and missing screws call for a quick fix with screws accompanied by rubber washers. A little tightening can work wonders.
For metal vent boots, inspect the seams for splits. These aren’t the splits you want in your life. Patch it up with caulk only if it’s a small split, otherwise, consider replacing it.
Finally, say a prayer to the wind gods and ensure that the vents are securely fastened. The wind loves to play with poorly secured vents. Let’s not tempt it!
Replace Damaged Step Flashing
Step flashing: the unsung hero tackling leaks at roof-walls. When it takes a hit, water finds its mischievous way indoors.
First, gently lift shingles to access old flashing. Pry it out but be gentle; we’re here to fix, not demolish.
Align the new step flashing, ensuring one end hugs the wall while the other overlaps the shingle edge. It’s like a protective dance for your roof.
Secure it with roofing nails, but remember: under the shingles, not through them. No one wants a nail-studded roof runway.
Seal with roofing cement where required. But be stingy. This isn’t a kindergarten glue project.
Patch Leaks Around Brick Chimneys
Brick chimneys might look charming, but boy, do they love a game of peek-a-boo with leaks. First, inspect the flashing around the chimney. Think of it as your raincoat’s zipper; if it’s off, you’re getting soaked.
Check the areas where the flashing meets the chimney. If it’s crumbling like grandma’s cookies, it’s time for a swap. Flexible sealant or caulk can work wonders here, but stick to elastomeric sealant. It stretches like a yoga instructor and keeps water out.
Mortar joints, too, can be tricksters. If they’re missing bits like a jigsaw puzzle forgotten by a toddler, additional mortar is your hero. Clean the area, slap on some mortar, and let it dry.
For a more proactive approach, consider a chimney cricket. It’s like pitching a tiny tent on the uphill side of your chimney. It directs water away, saving the day. Or at least your roof.
Control Leaking At Roof Joints
Roof joints can be as temperamental as a cat on a leash. To keep them in check, here’s what you can do:
First, inspect and replace any worn or damaged sealant. It’s like giving your roof a fresh coat of lipstick. Look out for cracks or gaps where different roofing materials meet—they’re leak-happy zones.
Second, install a backer rod before applying new sealant if gaps are larger than a quarter-inch. It fills space like cake inside a wedding dress, ensuring the fit is snug.
Third, consider using a high-quality flexible sealant to accommodate movement and temperature changes. Your roof contracts and expands more often than a toddler’s mood.
Finally, reinforce joints with flashing tape. It’s the duct tape of roofs, minus the sticky gray mess. Apply it securely over joints and laugh in the face of rain.
Handle these roof joints with care and precision, and they’ll stay as tight-lipped as a secretive spy.
Clean Out the Gutters
Ah, the gutters—the unsung heroes of the rooftop dance! Keeping them free of debris is as crucial as remembering to water your plants, but thankfully, slightly less demanding.
One. Twigs, leaves, and the occasional out-of-place frisbee love to crash the gutter party. Clear them out to keep water flowing correctly.
Two. Clogged gutters can act like a water slide, redirecting water onto the roof instead of away. A well-trained gutter ensures the water knows the proper exit route.
Three. Check for any sagging or loose connections. Just like a good fitting pair of pants, gutters should fit snugly against your home.
Four. If it’s raining and water cascades like the Niagara Falls down the side of your house, it’s not a magical new fountain; it’s time to clear those gutters.
Five. Avoid gutter cleaning during a windstorm unless you enjoy looking like a wet raccoon caught in the rain.
Keeping gutters clean is a small step for roof health but a giant leap for leak prevention!