Last updated on
In this comprehensive guide, you will learn the necessary steps to efficiently reseal your RV roof, prolong its lifespan and maintain its quality.
Key takeaways:
- Identify your RV roof material: TPO or EPDM
- Choose optimal weather conditions for resealing
- Thoroughly clean the area and remove old sealant
- Select and apply the right sealant for your roof material
- Maintain your RV roof through regular inspections and cleaning.
TPO Vs EPDM: What Kind of RV Roof Material Do You Have?
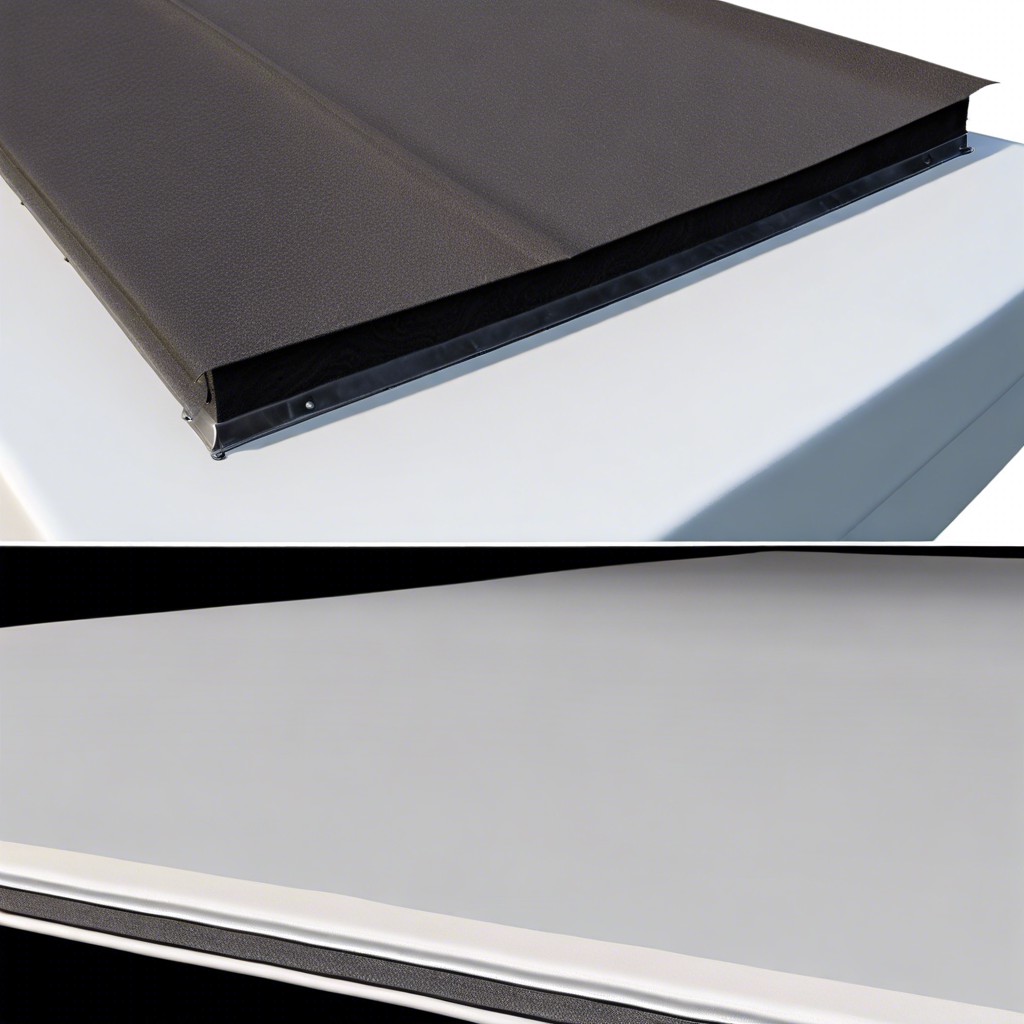
TPO (Thermoplastic Olefin) and EPDM (Ethylene Propylene Diene Monomer) are the two primary materials used in RV roofing, and identifying which one your RV has is critical for a proper resealing job.
TPO roofs are typically bright white and have a slightly glossy finish, known for their durability and being heat-reflective. They require a specific kind of sealant that adheres well to the thermoplastic material.
EPDM roofs, on the other hand, are often described as having a black underside with a texture that resembles a basketball. They are valued for their longevity and flexibility, especially under fluctuating temperatures. An EPDM-specific sealant is necessary for these roofs, as it’s formulated to bond with the rubber material, ensuring a water-tight seal.
When selecting sealants, it’s not just material compatibility that matters. Consider the sealant’s UV resistance, flexibility, and lifespan. Some are better suited for quick fixes, while others offer long-term solutions. Always check the manufacturer’s recommendations against your roofing type to make sure you’re using the right product. Remember, using the incorrect sealant can lead to inadequate sealing or even damage to the roof membrane.
Choose Your Timing Wisely
Selecting the ideal time for resealing your RV roof is crucial for ensuring the effectiveness of the repair. Optimal weather conditions play a significant role:
1. Dry Weather: Aim for a forecast with a clear, sunny stretch of about 2 to 3 days. Moisture can compromise the sealant’s ability to properly adhere and cure.
2. Moderate Temperatures: Look for mild temperatures, typically between 50°F and 90°F (10°C-32°C). Extreme heat can cause the sealant to dry too quickly, while cold weather can prolong the curing process.
3. Low Humidity: High humidity levels can affect the drying time and adhesion of the sealant. Try to choose a day with lower humidity to facilitate a better seal.
4. No Wind: Wind can blow debris onto the wet sealant, contaminating it and leading to a weaker bond.
Plan the application in alignment with these parameters to ensure that the new sealant forms a durable and protective barrier for your RV roof.
Clean the Area and Remove the Old Sealant
Prior to applying a new sealant, it’s imperative to thoroughly clean the roof surface. A gentle soap, water, and a soft brush can be used to remove surface dirt and debris. For tougher grime, a specialized RV roof cleaner may be necessary. After cleaning, allow the roof to dry completely before proceeding.
Scan the roof for old, cracked, or peeling sealant. Using a putty knife or a sealant removal tool, gently peel away the compromised material without damaging the underlying membrane. Take care to remove all remnants of the old sealant to ensure a smooth base for the new application.
Address any stubborn sealant with a commercial sealant remover or by gently heating with a heat gun. Remember to avoid excessive heat to prevent damaging the roof material.
Once the old sealant is fully removed, clean the exposed area again to remove any residual sealant remover or flakes. The surface should be immaculate, dry, and free of any oils or residues to guarantee optimal sealant adhesion.
Choosing and Applying the Right RV Roof Sealant
Selecting an appropriate sealant hinges on the type of RV roof material you have. For TPO roofs, use a sealant that’s compatible with the material to avoid degradation. EPDM roofs often require a sealant that’s specifically formulated for EPDM rubber to ensure a strong bond and lasting protection.
Silicone-based sealants are a popular choice for their durability and flexibility. Acrylic sealants, while lower in cost, may not offer the same level of UV resistance or lifespan as silicone. For small repairs, self-leveling sealants are ideal as they spread out evenly over the surface, while non-sagging sealants are better suited for vertical surfaces or edging.
When applying the sealant, start by cutting the tip of the tube at a 45-degree angle to match the size of the area being sealed. Use a caulking gun for an even and controlled application. Apply in a smooth, continuous bead, ensuring complete coverage of seams, around vents, and any other potential leak points. Using a putty knife or finger (wearing a disposable glove), smooth out the bead to ensure it’s fully adhering to the roof surface without gaps or bubbles. Allow adequate time for the sealant to cure, following the manufacturer’s recommendations, before exposing the RV roof to elements or movement.
Maintaining Your RV Roof After Sealing
Regular inspections are key to ensuring the longevity of your sealant. Twice a year, check for cracks, peeling, or areas that look worn. Pay close attention to the roof’s seams and edges, which are particularly prone to damage.
Clean your roof routinely. Gentle soap, water, and a soft brush are often adequate to remove dirt and debris that can wear at the sealant over time. Avoid harsh chemicals and power washers, which can degrade the sealant and the underlying roofing material.
Keep an eye out for standing water. Pooled water can indicate low spots on the roof where sealant may be compromised. Address these areas promptly to prevent water penetration.
Protect your roof from UV damage. UV rays can deteriorate roofing material and sealant. Use a UV protectant coating after sealing, and whenever necessary, to extend the life of both.
Be mindful of tree limbs and other overhanging hazards. Scuffs and punctures from branches can breach the sealant and the roof’s surface, causing leaks. Trim any overhanging branches to mitigate this risk.
Consider professional assessments every few years to ensure that all potential issues are addressed. Experts may identify problems that are not apparent to the untrained eye.
By following these preventive tips, your freshly sealed RV roof can maintain its integrity and provide worry-free protection from the elements.
FAQ
Can I reseal my own RV roof?
Yes, you can reseal your own RV roof by applying the RV roof seal paint with a clean, lint-free roller, ensuring great coverage around the vents, antenna, and seams.
How often should a RV roof be resealed?
An RV roof should ideally be resealed every two to four years, with the exact frequency depending on the weather conditions and the type of environment in which the vehicle is regularly driven.
What sealant should I use on my RV roof?
For most RV roof jobs, a self-leveling RV roof sealant would be an appropriate choice, which is particularly effective for sealing seams around rooftop accessories like vents and skylights.
How much does it cost to reseal a RV roof?
The cost to reseal an RV roof typically stands at $175 per linear foot, with a minimum per job cost of $4,200.
What are the steps involved in resealing an RV roof?
The steps involved in resealing an RV roof include inspecting for damage, cleaning the roof, removing old sealant, applying a new sealant, and allowing it to dry.
How can I identify signs that my RV roof needs resealing?
Signs that your RV roof needs resealing can be identified by finding water stains or leaks inside the RV, seeing cracks or breaks on the roof, or noticing a deterioration in the existing sealant.
What potential damages can occur if I neglect to reseal my RV roof?
Neglecting to reseal your RV roof can lead to potential damages such as leaks, water damage, structural deterioration, and consequent mold and mildew growth.


