Last updated on
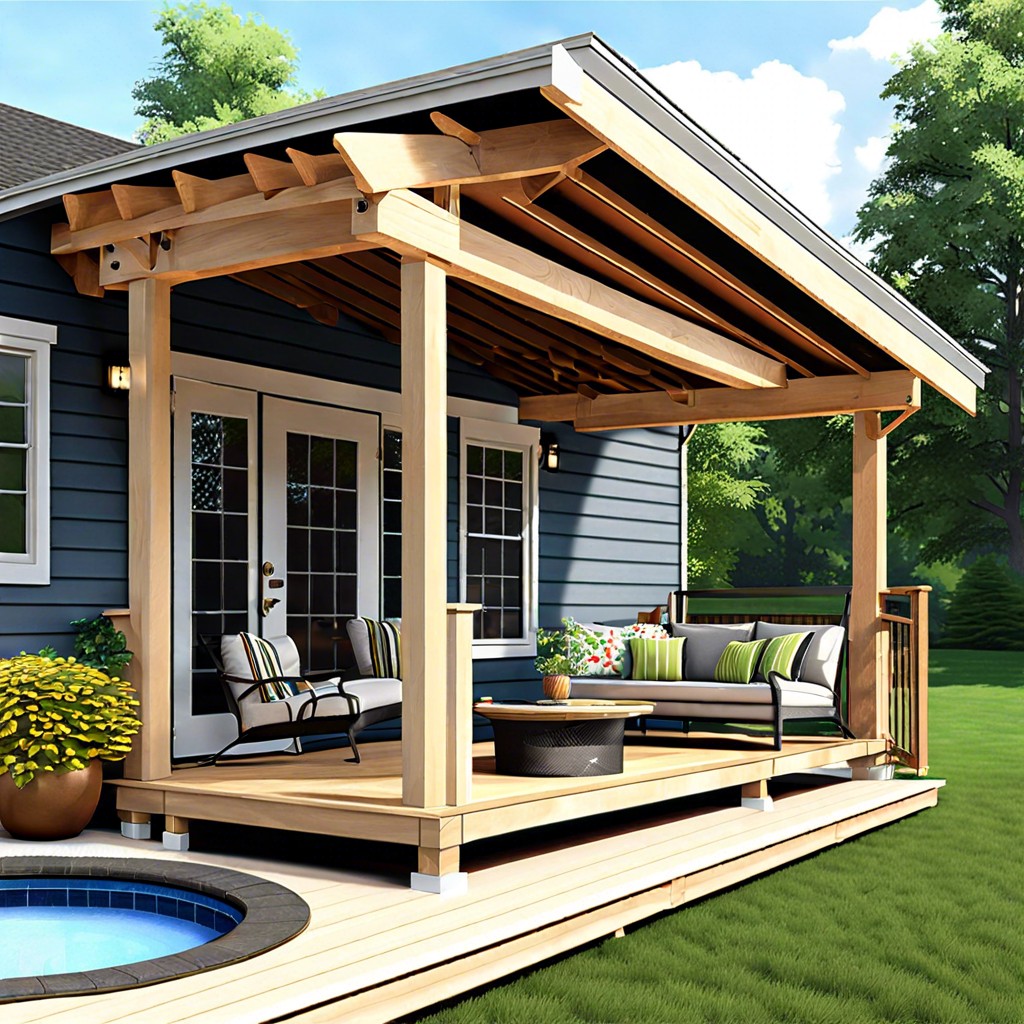
Learn how to build a lean-to roof over your deck to create a stylish and functional outdoor space.

Key takeaways:
- Measure and plan carefully for a stylish lean-to roof.
- Choose durable wood and the right roofing material.
- Install support posts securely and check for alignment.
- Measure, cut, and attach rafters evenly with proper runoff.
- Dress up the roof with plywood, underlayment, and your chosen material.
Planning and Design
Begin by measuring the space where you want the lean-to roof. Measure twice, cut once. Seriously, it’s good advice.
Consider the roof’s angle – a steeper pitch will let water and snow slide off like it’s an Olympic luge run. Lower pitches might save you a bit of headroom, but they’ll give snow a comfy place to nap.
Choose the right height. You don’t want to bump your head every time you step out onto the deck. Unless you enjoy chiropractors.
Think about the aesthetic. A lean-to should look like it belongs there, not like it crash-landed from another planet.
Lastly, check local building codes. They exist to keep your lean-to from becoming a lean-fall.
Material Selection
You’re standing in the lumber aisle, eyes wide, trying to decipher the difference between pressure-treated and cedar. Not as easy as picking a Netflix show, right?
First, choose durable wood. Pressure-treated lumber is your trusty sidekick; it’s resistant to rot and insects. Cedar, however, offers natural beauty and excellent durability but comes with a heftier price tag.
Next, think roofing material. Corrugated metal sheets are lightweight and easy to install, plus they make the rain sound like a soothing drum solo. Shingles, while classic, can give your deck a polished look that says, “I came here to relax in style.”
Lastly, grab some weatherproof fasteners. Those nails and screws should withstand the wrath of Mother Nature without rusting into oblivion.
You’ve got choices, but hey, options are good!
Installing Support Posts
Measure and mark the locations for your support posts accurately. No one likes a wonky roof. Use a level and tape measure to ensure your marks are correct.
Dig post holes at least 2 feet deep. We want these posts to stay put during a blustery wind, after all.
Place your posts in the holes and pour concrete around them. This isn’t the time for shortcuts; stability is key. Let it set for 24-48 hours.
Use pressure-treated lumber for the posts. They will stand strong against the elements, unlike your Uncle Bob in a rainstorm.
Double-check for vertical alignment using a level. A leaning post now equates to a leaning roof later.
Attach the posts securely to the deck with lag screws. Ensure a snug fit; imagine your posts as the superheroes holding your roof aloft.
Installing Rafters
Start by measuring and cutting your rafters to the desired length. Remember, it’s all about precision here – measure twice, cut once. Attach the rafters to the ledger board that’s fastened to the side of your house. This will provide sturdy support.
Secure the other end of the rafters to the beam on the opposite side of the deck. Use joist hangers or hurricane ties for extra stability – better safe than sorry. Space the rafters evenly, usually around 16 or 24 inches apart. Think of it like ribs on a dragon – not too close, not too far.
Check the angle to ensure proper runoff; you don’t want a mini lake on your deck. It’s all about keeping that water flowing off smoothly. And hey, if you find yourself doing a rain dance later, you’ve probably done it right.
Adding Roofing Material
Now that your rafters are firmly in place, it’s time to dress them up. Let’s talk shingles, metal sheets, or even good old corrugated plastic. Your choice, your flavor.
First, slap down some plywood sheathing to give your roof a solid base. Think of it as the bread in your roofing sandwich.
Next, a layer of roofing felt or underlayment. It’s like putting on sunscreen. Protects from leaks, those pesky water intruders.
Then, the main act: Whether you’re opting for shingles, metal, or plastic, start from the bottom and work your way up. Gravity isn’t just a good idea, it’s the law.
Secure each piece snugly. Remember, no wobbly bits allowed. Overlap correctly to ensure no sneaky leaks.
Lastly, cap it off at the peak. A ridge cap isn’t just a stylish hat; it keeps water out with pizzazz.
And voila, you’ve added style and functionality to your lean-to roof. Happy nailing!


