Last updated on
This how-to guide provides a step-by-step approach to metal roof installation, covering everything from materials selection to final touches.
Key takeaways:
- Tools required: tape measure, snips, hammer, safety equipment, sealant gun.
- Materials required: metal panels, underlayment, fasteners, flashing, drip edge.
- Step 1: Apply underlayment with proper overlapping and securing.
- Step 2: Set panels carefully with hidden fasteners or screws.
- Step 3: Secure ridge cap for waterproofing and proper ventilation.
Tools Required

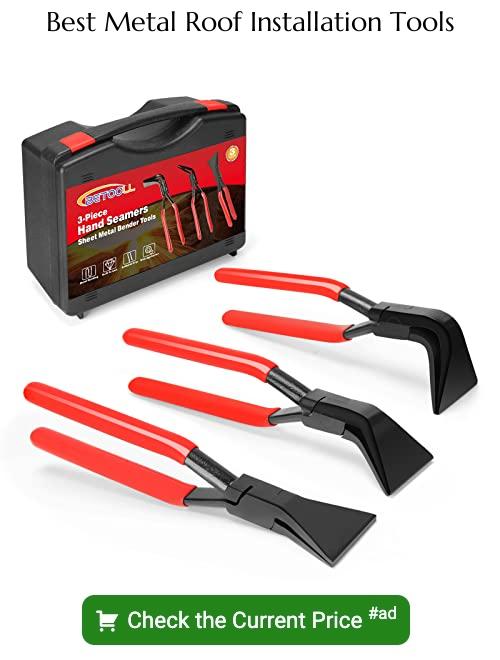
Before beginning a metal roof installation, ensure you have the right tools on hand. A tape measure is indispensable for accurate panel sizing. Tin snips will cut panels to the correct dimensions while aviation snips are ideal for trimming and shaping. A hammer, or better, a roofing nail gun, will expedite the fastening process. A screw gun is essential for securing metal panels with screws, which provide a stronger hold than nails.
For precise work, a roofing square helps with alignment and a chalk line ensures straight, level lines across your roof. Safety cannot be overlooked: a sturdy ladder, safety harness, and gloves are non-negotiable for preventing injuries. Lastly, sealant guns are necessary for applying caulks and sealants to prevent leaks and ensure a watertight finish. Ensure each tool is in good working order to facilitate a smooth installation process.
Materials Required
Selecting the appropriate materials is crucial for a successful metal roof installation. High-quality metal panels, often made of steel, aluminum, or copper, provide the core protection for your home. They come in various styles including standing seam, corrugated, and tile look-alike.
The underlayment acts as a secondary barrier against the elements and is typically made of felt or synthetic fabric. It’s installed directly onto the roof deck.
Fasteners, generally screws or nails designed for metal roofing, must be compatible with the panels to prevent corrosion.
Flashing made from the same material as the panels will be required around edges, vents, and chimneys to prevent water ingress.
For the edges of the roof, drip edge is essential to channel water away from the fascia and protect the underlying wood.
The ridge cap covers the peak of the roof where the two slopes meet, providing both aesthetic appeal and a watertight seal.
Sealant or butyl tape will be needed to seal joints and prevent leaks.
Vent boots, also known as pipe boots, are used to waterproof pipes penetrating the roof surface.
Safety equipment, including harnesses, gloves, and eye protection, is essential to ensure a safe installation process.
Step 1: Apply the Underlayment
Before laying metal panels, it’s essential to ensure that the roof deck is smooth and solid. Start by rolling out the underlayment horizontally, from the eave to the ridge. Overlap each course by a minimum of 6 inches, or as specified by the manufacturer. This overlapping redirects water that manages to get under the roofing material away from the roofing deck, thus protecting the longevity of the roof.
For enhanced protection against wind-driven rain, you might also want to install an ice and water shield at the eaves, valleys, and around any roof penetrations.
When securing the underlayment, use cap nails spaced according to local building codes and manufacturer’s recommendations. This prevents the material from billowing or detaching before the metal panels are installed. The proper installation of the underlayment is crucial as it acts as a secondary barrier against moisture, thereby protecting the roof structure from water damage.
Step 2: Set the Panels
Before laying the panels, ensure that the underlayment is properly secured and that the surface is clean. Begin at the bottom corner of the roof and lay the first metal panel. Make sure it’s square to the roof line and eave to guarantee straight rows. Overlapping panels typically have an underside with a lip that secures over the adjacent panel, creating a water-tight seal.
When placing panels, align them carefully before fastening; most metal roofs use hidden fasteners or screws with rubber washers. Start at the eaves and secure screws straight down into the roof decking or into the purlins beneath. Follow the manufacturer’s specific fastening pattern, which usually involves screws along the panel’s edges and at pre-defined intervals in the interior sections.
Remember that metal expands and contracts with temperature changes. Hence, fasteners should be tight enough to hold but not so tight that they prevent this movement. After the first panel is in place, continue with subsequent panels, always making sure edges are aligned and the panels interlock correctly. Overlapping should be consistent, as recommended by the roofing material manufacturer, to ensure the most effective water runoff.
Use sealant between the panels when advised by the manufacturer, especially in areas prone to heavy rainfall or snow. Ensure each row of panels is perfectly horizontal before starting the next, as mistakes compound and can lead to an uneven appearance or functional defects. Lead with precision, patience, and proper alignment for a successful installation.
Step 3: Secure the Ridge Cap
Once your panels are in place, it’s time to ensure your metal roof is properly crowned with a ridge cap, which is crucial for waterproofing the peak where two roof slopes meet. Start by aligning the ridge cap so that it’s centered over the seam of the two panels. Each edge should overhang equally on either side of the ridge to ensure symmetry and full coverage.
For a secure installation, use specialized metal roofing screws that match the color of your ridge cap. These should be placed about 12 to 16 inches apart along both sides of the ridge. When driving in screws, ensure there is enough pressure to compress the washer without damaging the metal, creating a snug, weather-tight seal.
It’s important to work your way from one end to the other, checking periodically to maintain your alignment. Overlapping ridge cap sections is necessary for long roof spans, and these overlaps should typically be a minimum of 6 inches, sealed with butyl tape or a sealant between layers for added protection against moisture.
Lastly, if you’re working with a vented ridge cap, make sure you’ve installed the proper vent material under the cap before securing it. This will provide necessary attic ventilation, crucial for temperature regulation and moisture control within your home.


