Last updated on
Discover the various types of roof framing systems and enhance your architectural knowledge as we delve into their unique features, benefits, and applications in today’s construction industry.
When it comes to building a roof, the framing system is an essential component that provides structural support and stability. There are various types of roof framing systems, each with its unique advantages and disadvantages.
As a homeowner or builder, understanding these different systems can help you make informed decisions about which one is best suited for your needs. In this article, we will explore the most common types of roof framing systems used in modern construction and their distinctive features.
So whether you’re planning a new build or considering replacing your existing roof, keep reading to learn more about the different options available to you!
Common Roof Framing Techniques
This method involves assembling individual pieces of lumber on-site to create the roof structure. Stick-framed roofs are versatile and can be used for a wide range of architectural styles, including gable, hip, and gambrel roofs.
Another popular technique is truss roofing systems that use prefabricated triangular structures made from wood or steel. Trusses offer several benefits over stick-framing methods; they’re faster to install since they come pre-assembled offsite and require fewer materials overall.
A third option is panelized roofing systems that involve using large sections of pre-built panels assembled in a factory setting before being transported to the job site for installation. Panelized roofs are ideal for larger commercial buildings where speed and efficiency are critical factors.
Determining Roof Pitch
The pitch, also known as slope, refers to how steep or flat a roof is and affects its overall appearance and functionality. A steeper pitch allows for better water drainage and ventilation while a flatter one provides more space for living or storage.
To determine the pitch of your roof, you can use various methods such as measuring from inside the attic or using specialized tools like a level gauge. One common technique involves placing a ladder against the house’s exterior wall at different heights until it reaches where you want to measure from.
Once you have determined your roof’s angle, it will be easier to select an appropriate framing system that can support its weight while providing adequate protection against weather elements such as rainwater runoff and snow accumulation.
Rafter Layout Techniques
There are several rafter layout techniques that builders use depending on their preference and experience. One common method is using a framing square to mark out each rafter’s length and angle cuts accurately.
The framing square technique involves marking two lines on each rafter board: one for plumb cut (the vertical cut at the top end) and another for birdsmouth (the notch where it sits atop a wall plate). The process requires some basic math skills, but once mastered, it can be an efficient way of laying out rafters quickly.
Another popular technique used by many builders is called “pivoting square” or “pivot point” method. This approach involves creating a pattern from scrap wood or cardboard with all necessary angles marked in advance.
Once this template has been created, you can use it as a guide to mark all your rafters’ cuts without having to measure every time.
Regardless of which technique you choose when laying out your roof’s rafters, accuracy is key! Even small errors in measurement or cutting can lead to significant problems down the line during installation and cause structural issues with your roof over time.
Framing Square Rafter Layout
This technique involves using a framing square, which is an L-shaped tool with two arms that meet at a 90-degree angle. The longer arm of the square is called the blade, while the shorter one is known as the tongue.
To use this method for rafter layout, you need to know your roof pitch and span measurements. Once you have these figures, place your framing square on top of your lumber board with its tongue facing up towards you.
Next, align one end of your board along with any number on either side of the blade that corresponds to half or full inches in length depending on how precise you want it to be. Then slide down until reaching where it intersects with another number representing pitch degrees (usually marked in red).
From there draw lines along both edges using each corresponding degree mark as reference points before cutting out pieces accordingly – making sure not only do they fit together perfectly but also provide enough support for weight-bearing purposes!.
Cutting the Pattern for Rafters
This process involves using a framing square to mark out each rafter’s cuts accurately. The framing square is an essential tool in roof construction as it helps ensure that all of your rafters are cut precisely and fit together correctly.
To begin, place one end of the framing square on top of a rafter board with its tongue facing up towards you. Then align the pivot point at 12 inches (or any other desired measurement) along one edge of this board before marking where this line intersects with another edge using a pencil or marker pen.
Next, rotate your framing square so that its heel rests against this same edge while keeping its tongue aligned with what was just marked earlier – now draw another line parallel to these two lines but offset by whatever distance corresponds to half thickness plus depth allowance per side from centerline (usually around 3/4 inch).
Repeat these steps until all necessary cuts have been made on each individual rafter board according to their respective lengths and angles required by design specifications or local building codes.
Pivoting Square Method for Rafters
This method involves using a framing square, which is an L-shaped tool that consists of two arms with measurements marked on them.
To use this method, you start by marking the rafter’s run (the horizontal distance from the ridge board to the outside wall) and pitch (the vertical rise per foot). Then, place one arm of your framing square on top of your rafter material at its end point.
Pivot it until it aligns with your pitch measurement along its edge.
Next, mark where both arms intersect onto your rafter material. This will give you an accurate cut line for each individual piece needed in constructing a roof frame.
While this may seem like a complicated process at first glance, mastering this technique can save time and money when building roofs as well as ensure structural integrity over time.
Addressing Framing Issues
Common problems include sagging or uneven roofs, cracked rafters or trusses, and inadequate bracing. These issues can be caused by various factors such as poor workmanship during construction, exposure to harsh weather conditions over time, or improper maintenance.
To address these framing issues effectively requires a thorough inspection of the roof structure by a professional contractor who specializes in roofing repairs. They will assess the extent of damage and recommend appropriate solutions such as reinforcing weak areas with additional supports or replacing damaged components entirely.
It’s essential to address any framing problems promptly because they can compromise the integrity of your entire home’s structure if left unattended for too long.
Roof Framing Materials
The most common materials used for roof framing include wood, steel, and engineered lumber.
Wood remains a popular choice due to its affordability and ease of use. It’s also readily available in various sizes and shapes that can be cut to fit any design specifications.
However, it’s susceptible to rotting or warping over time if not adequately treated or maintained.
Steel is another option that offers excellent strength-to-weight ratio compared to wood but comes at a higher cost. It’s resistant to pests such as termites and doesn’t require treatment against moisture damage like wood does.
Engineered lumber products such as laminated veneer lumber (LVL) are becoming increasingly popular due to their superior strength properties compared with traditional timber while being more environmentally friendly than steel options.
Various Roof Types
The type of roof you choose will depend on various factors such as the climate in your area, architectural style preferences, and budget constraints.
Flat roofs are a popular choice for commercial buildings because they provide ample space for rooftop equipment installations. Gable roofs have two sloping sides that meet at the ridge line and offer excellent ventilation while providing adequate attic space.
Hip roofs have four sloping sides that converge at a central point, making them ideal for areas prone to high winds or hurricanes. Skillion (or shed) roofs slope in one direction only and are commonly used in modern architecture designs.
Butterfly (or inverted) roof designs feature two V-shaped slopes that angle upwards from opposite ends of the building’s exterior walls towards each other creating an open valley between them which can be utilized as an outdoor living area or garden terrace.
Gambrel (barn-style) roofing is characterized by steeply pitched upper slopes with shallower lower ones offering more headroom inside attics than gable roofing styles do. Mansard roofing has four nearly vertical sides with double-pitched slopes on all four faces allowing maximum use of interior spaces under it while Saltbox design features asymmetrical gables where one side is longer than the other giving it a unique look.
Flat Roof Framing
Unlike sloped roofs, which rely on gravity to shed water and snow, flat roofs require a different framing system that allows for proper drainage. The most common type of flat roof framing is the joist-and-deck method.
This involves laying down wooden or steel joists across the building’s walls and then attaching plywood or metal decking to create a level surface.
One of the benefits of using this method is that it provides ample space for insulation between the deck and roofing material. However, one downside to consider with this type of roofing system is its susceptibility to leaks if not installed correctly.
Another option for constructing a flat roof involves using precast concrete panels as support beams instead of traditional wood or steel joists. These panels are designed specifically for use in low-slope applications like those found on many commercial buildings.
Gable Roof Framing
It consists of two sloping sides that meet at a ridge or peak, forming a triangular shape. The gable design is simple and efficient, making it an excellent choice for many residential and commercial buildings.
To frame a gable roof correctly, you need to determine the pitch angle first. This measurement will help you calculate rafter length accurately and ensure proper support for your roofing materials.
Once you have determined your pitch angle, use framing squares to lay out each rafter’s cuts precisely. You’ll also need to install collar ties or ridge beams across the top of your rafters to prevent them from spreading apart under heavy loads like snow accumulation.
Gable roofs are versatile in their application as they can be used on various building styles such as ranch-style homes with low-pitched roofs or grand colonial mansions with steeply pitched ones.
Hip Roof Framing
This design provides excellent stability and resistance against strong winds, making it ideal for areas prone to hurricanes or tornadoes. Hip roofs are also aesthetically pleasing and can add value to your property.
To frame a hip roof, you will need to determine the length of each rafter using trigonometry calculations based on the pitch angle and run distance. The rafters will then be cut with angled ends called “hip cuts” that fit together at the corners where they meet.
One advantage of hip roofs is their versatility in accommodating different shapes and sizes while maintaining structural integrity. They can be designed as square or rectangular structures with equal-length sides or as irregular polygons with varying lengths.
Another benefit is their ability to provide additional living space in attics due to their steep slope angles which create more headroom than other types of roofing systems like flat roofs.
If you’re looking for an attractive yet sturdy roofing system that offers ample attic space while providing protection from harsh weather conditions such as high winds, hailstorms etc., consider installing a hip roof framing system!.
Skillion Roof Framing
This type of roofing system is commonly used in modern architecture and can be seen on many residential and commercial buildings.
Skillion roofs are relatively easy to construct compared to other types of roofing systems. They require fewer materials and less labor, making them an affordable option for those on a tight budget.
Their simple design allows for more flexibility in terms of layout and orientation.
However, it’s important to note that skillion roofs may not be suitable for areas with heavy snowfall or high winds due to their low pitch angle. It’s crucial that you consult with your local building codes before deciding on this type of roofing system.
Butterfly Roof Framing
This type of roof resembles the wings of a butterfly, with two V-shaped panels sloping inward towards each other at the center. The result is an eye-catching and modern look that also offers practical benefits.
One advantage of this design is its ability to collect rainwater for reuse or irrigation purposes. The central valley acts as a natural gutter, directing water towards downspouts located at either end of the building.
However, constructing a butterfly roof requires careful planning and execution to ensure proper drainage and prevent leaks. It’s essential to work with experienced professionals who understand how to properly frame this type of structure using specialized techniques such as cantilevering or steel beams.
Despite these challenges, many homeowners are drawn to the striking appearance and eco-friendly features offered by butterfly roofs.
Gambrel Roof Framing
It features two slopes on each side of the ridge with the lower slope being steeper than the upper one. This design provides more headroom in the upper level of a building while maximizing storage space in its lower level.
To frame a gambrel roof, you will need to use trusses or rafters that are cut at specific angles to create this unique shape. The framing process can be challenging due to its complex geometry and requires careful planning and precise measurements.
One advantage of using gambrel roof framing is that it allows for additional living space without increasing your home’s footprint. You can add dormers or windows on either side of your attic room to let natural light into your living area while enjoying an unobstructed view outside.
Another benefit is that it provides better ventilation compared to other roofing systems since hot air rises up through its steep pitch creating natural airflow throughout your home’s interior spaces.
Mansard Roof Framing
This style of roof features two slopes on each side, with the lower slope being steeper than the upper one. The steep lower slope allows for more headroom in the attic or top floor of a building, making it an ideal option for those looking to add extra living space without expanding their home’s footprint.
To frame a Mansard roof, you will need to use special techniques that differ from those used in other types of roofs. One such technique involves using dormer windows and framing them into place before constructing the rest of the roof structure.
Another important consideration when framing a Mansard roof is ensuring that all angles are cut precisely and accurately measured. Any errors can result in uneven slopes or gaps between sections, which can compromise both structural integrity and aesthetic appeal.
Saltbox Roof Framing
It features a long, sloping roofline on one side and a short, steep slope on the other. This asymmetrical design creates an interesting visual appeal while also providing practical benefits such as increased headroom and improved ventilation.
Saltbox roofs are typically framed using traditional techniques such as post-and-beam or timber framing. The longer side of the roof is supported by multiple rafters that run from the ridge beam to the top plate of the wall, while shorter rafters support the steeper side.
One challenge with saltbox roofs is determining proper rafter length due to their asymmetrical design. However, this can be easily overcome by using specialized software or consulting with an experienced roofer.
Saltbox roofs offer both aesthetic appeal and functional benefits for homeowners looking for something different than traditional roofing styles.
Curved Roof Framing
However, framing a curved roof requires specialized techniques and materials. The most common method for framing a curved roof involves using laminated veneer lumber (LVL) or glued-laminated timber (glulam) beams that are bent into the desired shape.
These beams are then cut into smaller sections called ribs, which form the framework for the roofing material.
The curvature of the roof determines how many ribs will be needed to support it adequately. A tighter curve will require more ribs than a gentler one, but this also means more structural stability.
When designing your curved roof frame, it’s essential to work with an experienced architect or engineer who understands these principles and can ensure that your design meets all necessary safety requirements while still achieving your aesthetic goals.
Rafter-to-Hip Connections
The hip rafters are inclined at an angle and connect to the ridge beam, which runs along the top of your roof’s peak. They also attach to each end of a common rafter that extends from one side of your roof to another.
To make this connection, you’ll need to use special hardware called hurricane ties or metal brackets that secure both rafters together firmly. These connectors help distribute weight evenly across all parts of your roofing structure and prevent any potential damage caused by high winds or heavy snow loads.
It’s essential not only for safety reasons but also for ensuring long-term durability and stability in your roofing system that you get this connection right during installation. If done correctly, it can provide excellent support against lateral forces acting on roofs such as wind uplifts while maintaining structural integrity over time.
Understanding how different components work together is crucial when building a strong and reliable roofing structure.
Rafter-to-Valley Connections
This connection is where two different roof planes meet at an angle, and it requires careful attention to ensure that it’s strong enough to withstand heavy loads and high winds.
To make this connection, you’ll need to cut a birdsmouth notch into each rafter so that it can sit flush against the valley board. The birdsmouth notch should be precisely measured and cut according to your specific design requirements.
Once you’ve made your cuts, secure each rafter with metal connectors or hurricane ties for added strength. These connectors will help prevent uplift forces from pulling the rafters away from their intended position during severe weather conditions.
It’s essential also to consider proper ventilation when making this type of connection as trapped moisture can lead to rotting wood over time. Proper ventilation helps keep air flowing through your attic space while preventing moisture buildup that could damage both your roofing materials and structural components.
Ensuring a solid rafter-to-valley connection is crucial for maintaining overall stability in any roofing system.
Rafter-to-Ridge Connections
The ridge board runs horizontally along the peak of a gable roof and provides support for both sides’ rafters. To ensure that this connection is strong and secure, it’s essential to use proper techniques during installation.
There are several methods for connecting rafters to ridges, including toe-nailing, using metal connectors or brackets, or birdsmouth cuts. Toe-nailing involves driving nails at an angle through the rafter into the ridge board; however, this method can weaken over time due to wood shrinkage and expansion.
Using metal connectors or brackets offers more stability than toe-nailing as they provide additional support against lateral forces such as wind uplifts. Birdsmouth cuts involve cutting out notches on each rafter’s underside where they meet with a horizontal plate atop walls called wall plates before attaching them securely with bolts.
Hip-to-Ridge Connections
This connection must be strong enough to withstand wind and other external forces that can cause damage to your roof. There are several ways to connect hips and ridges, including using metal connectors or framing angles.
A common method for connecting hips and ridges is through a birdsmouth cut on each rafter, which allows them to fit snugly together at the ridge board. Another option is using metal brackets designed specifically for this purpose.
Regardless of which method you choose, it’s essential that you follow proper installation techniques and use high-quality materials for maximum strength and durability.
Understanding how different types of roofs are framed can help homeowners make informed decisions about their roofing needs.
Building Stronger Roofs
A well-built roof not only protects your home from the elements but also adds value to your property. To ensure that your roof is strong enough to withstand harsh weather conditions, you need to pay attention to several key areas during construction.
One of the most critical aspects of building a stronger roof is selecting high-quality materials. From rafters and trusses to decking and underlayment, every component must be carefully chosen for its strength and durability.
Another essential factor in creating a robust roofing system is proper installation techniques. Even the best materials can fail if they are not installed correctly or if shortcuts are taken during construction.
Regular maintenance plays an important role in keeping your roof strong over time. Regular inspections can help identify potential issues before they become major problems while routine cleaning helps prevent debris buildup that could compromise structural integrity.
Roof Framing Safety Considerations
As you plan your roofing project, it’s essential to prioritize safety and take the necessary steps to protect yourself and others from potential hazards.
One of the most critical aspects of roof framing safety is ensuring that all workers involved in the project have received adequate training on how to work safely at heights. This includes understanding how to use personal protective equipment (PPE) such as harnesses, hard hats, and non-slip footwear.
Before starting any work on a roof frame system or structure itself should be inspected for stability. Any weak spots or damage must be addressed before proceeding with any further construction activities.
It’s also important always to follow manufacturer instructions when using tools like nail guns or saws while working at height; these tools can cause serious injuries if used improperly.
Finally yet importantly ensure that there are no electrical wires running through areas where you will need access during installation; this could lead electrocution accidents which may result in fatalities.
FAQ
What are the 2 basic roof framing types?
The 2 basic roof framing types are pre-manufactured trusses and stick framing (rafters and ceiling joists).
What is the most common type of roof framing?
The most common type of roof framing is gable roofs, which feature two sloping sides meeting at a top ridge and creating end walls with triangular extensions at the top.
What are the five 5 common types of rafters used for roof framing?
The five common types of rafters used for roof framing are common, hip, hip jack, valley, and valley jack.
What are the differences between stick-built and truss roof framing systems?
Answer: Stick-built roof framing systems involve constructing rafters on-site, while truss roof framing systems use pre-engineered trusses assembled off-site and then installed.
How does roof pitch impact the choice of roof framing type?
Roof pitch impacts the choice of roof framing type as steeper pitches typically require more complex framing systems to provide adequate support and stability.
What are the advantages and disadvantages of various roof framing types?
Advantages and disadvantages of various roof framing types include cost effectiveness, energy efficiency, complexity of construction, and design flexibility.
Read More
 Standing Seam Metal Roof Installation: Your Guide to a Durable and Stylish Finish
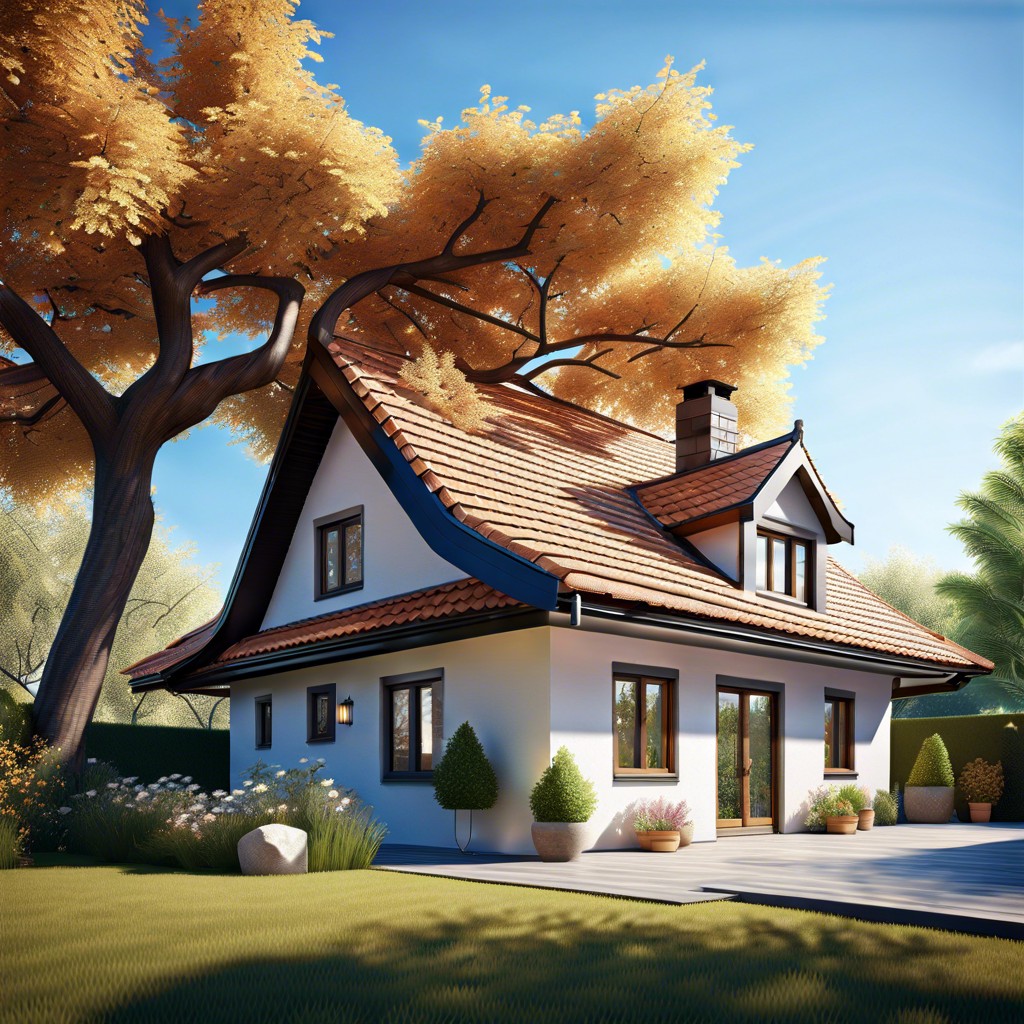 Pitched Roof Perks: How It Tops Flat Alternatives
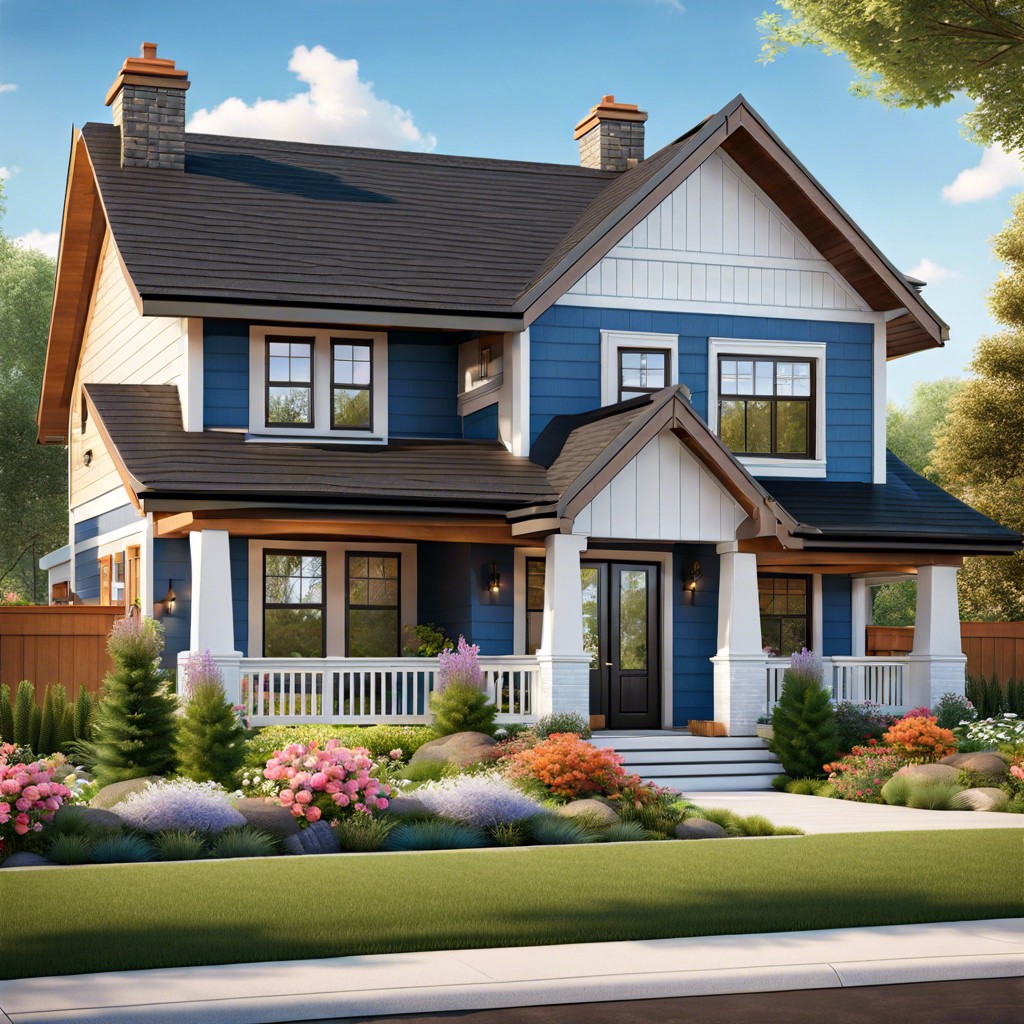 Asphalt Roof: Your Guide to Longevity and Savings
 Slate Roof Cost: What to Expect and Why It’s Worth the Investment
 Shingle Roof Cost: Your Wallet’s Best Friend or Foe?