Last updated on
In this guide, you’ll learn the meticulous process of framing a slanted shed roof, enabling you to create a robust and weather-resistant structure.
Key takeaways:
- Understanding roof pitch for a slanted shed roof:
- – Weather considerations
- – Material efficiency
- – Interior space
- – Aesthetic impact
- Selecting materials for framing a slanted shed roof:
- – Pressure-treated lumber for framing
- – Oriented strand board (OSB) or plywood for sheathing
- – Metal connectors for structural integrity
- – Choose roofing material based on climate and budget
- Assembling and attaching rafters for a slanted shed roof:
- – Cut rafters to desired length and notch for a snug fit
- – Space rafters evenly and secure to top plate
- – Add collar ties for support, install ridge board
- Waterproofing and covering a slanted shed roof:
- – Apply roofing felt as a secondary barrier
- – Use asphalt shingles, metal sheets, or corrugated plastic
- – Overlap rows and flash around edges and joints
- Safety precautions for roof framing:
- – Wear hard hat and eye protection
- – Use non-slip sole footwear and anchor ladder securely
- – Keep work area tidy, store tools safely
- – Stay hydrated and take breaks in hot weather
Understanding Roof Pitch for a Slanted Shed Roof
Roof pitch, defined as the angle or slope of the roof, directly influences both the aesthetics and functionality of your slanted shed roof. It’s typically expressed as a ratio of vertical rise to horizontal run. For instance, a pitch of 4:12 means the roof rises 4 inches for every 12 inches of horizontal distance.
Here’s why understanding roof pitch is crucial:
- Weather Considerations: In areas with heavy snowfall, a steeper pitch helps shed snow, reducing the weight load. Conversely, in high-wind regions, a lower pitch can present less resistance to wind uplift.
- Material Efficiency: Different pitches may require unique framing strategies or materials, impacting the overall cost and construction method.
- Interior Space: Higher pitch roofs can provide additional attic storage or even extra living space, while low-pitched roofs might limit these options.
- Aesthetic Impact: The pitch of your shed roof will contribute to the overall look of the building. A steeper pitch can give a dramatic, classic appearance, while a lower slope offers a modern, sleek profile.
Select the pitch carefully to ensure it aligns with the intended purpose, appearance, and environmental demands of your shed.
Selecting Materials for Framing a Slanted Shed Roof
Choosing the right materials is crucial for the longevity and stability of your shed’s slanted roof. You’ll typically want to opt for pressure-treated lumber for the structural framing due to its resistance to rot and insects. The size of the lumber, commonly 2×4 or 2×6, should correspond to the span of the roof and snow load for the area.
For sheathing, oriented strand board (OSB) or plywood are standard choices because they provide a solid base for roofing materials and are cost-effective. Ensure the thickness of the sheathing complies with local building codes, which often dictate the minimum required based on the rafter spacing.
Metal connectors, such as rafter ties and hurricane clips, can enhance the roof’s structural integrity, especially in regions prone to high winds. Fasteners, including nails and screws, should be galvanized or stainless steel to prevent rust.
For the top layer, roofing material options vary from traditional asphalt shingles to metal roofing, each offering different aesthetic appeals, life expectancies, and price points. Select a roofing material that aligns with your local climate, budget, and desired maintenance level.
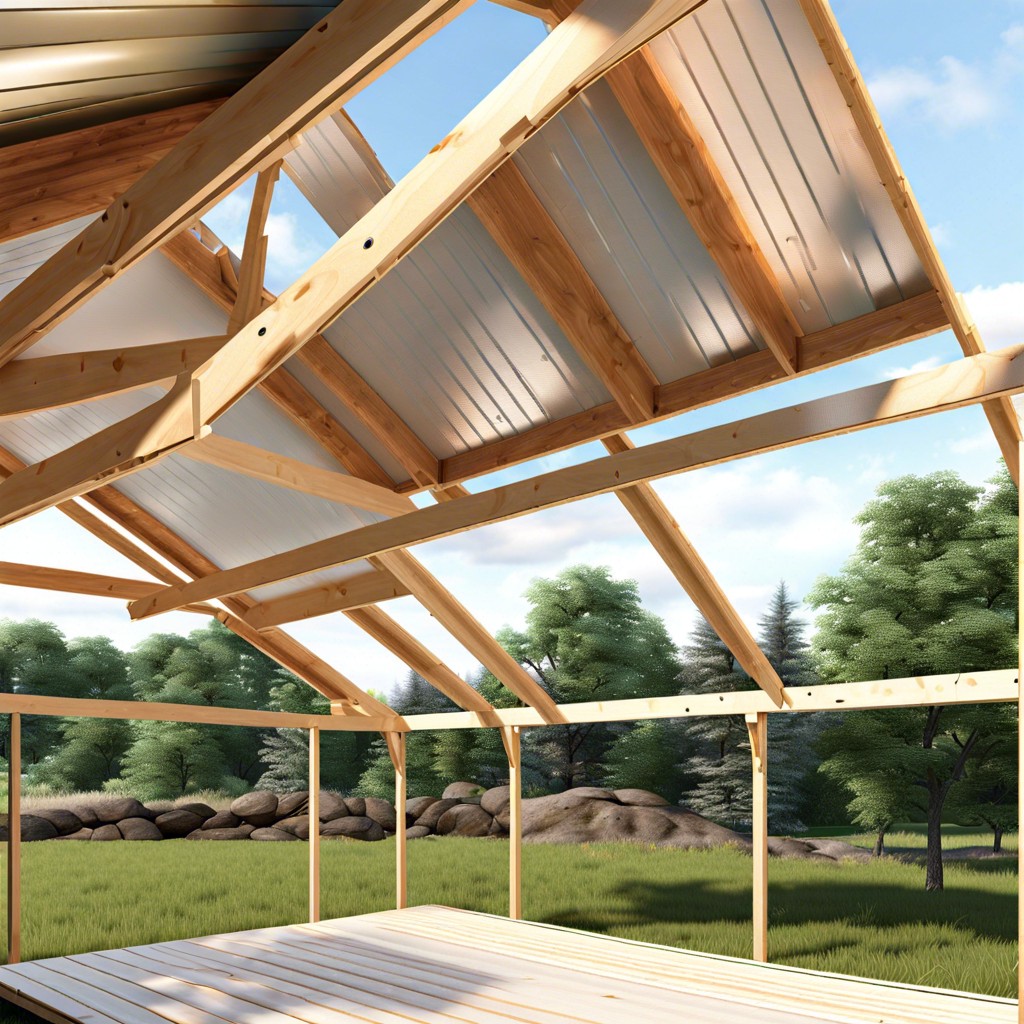
Assembling and Attaching Rafters for a Slanted Shed Roof
Begin with cutting rafters to the desired length, factoring in the pitch of the roof and overhang. The tail end of each rafter should be notched, or “birdsmouthed,” to ensure a snug fit over the shed’s wall top plate. For accuracy and consistency, use a template rafter as a guide when marking and cutting the remaining rafters.
Space rafters evenly along the wall top plate, typically 16 or 24 inches on center, unless the roof design calls for a different spacing. Secure each rafter in place with galvanized nails or screws, driven through the rafter and into the top plate. It is crucial to maintain alignment and level across the rafters; this may require temporary bracing until the roof sheathing is installed to stabilize the structure.
Collar ties may be added between opposing rafters for additional support, installed at a height dictated by the roof design and load requirements. Lastly, the ridge board should be set in position at the peak, where rafters from both sides of the roof meet. Each rafter should be fastened to the ridge board, creating a secure and symmetrical framework for the slanted shed roof.
Waterproofing and Covering a Slanted Shed Roof
Once rafters are in place, waterproofing is the next critical step to protect your shed from the elements. Start by applying a layer of roofing felt, which acts as a secondary barrier against water penetration. Overlap the felt strips to avoid gaps, and secure them with appropriate staples or nails.
After the felt, it’s time to install the final roof covering. Popular options include asphalt shingles, metal sheets, or corrugated plastic.
Asphalt shingles are a cost-effective and widely available choice. Begin at the roof’s lower edge and work upwards, ensuring each row overlaps the one beneath it to shed water efficiently.
When using metal sheets or corrugated plastic, align the panels carefully and fix them with screws that have rubber washers for a water-tight seal. Remember to flash around the edges and at any joints, using an appropriate sealant to prevent leaks. Always trim excess material to ensure a clean finish.
Regular maintenance, including checking for wear and tear, is crucial to extend the life of your waterproofing efforts.
Safety Precautions for Roof Framing
Always prioritize safety when embarking on a roofing project. Wear a hard hat to shield your head from falling objects and debris. Eye protection is equally important, as it prevents dust and particles from impairing your vision during construction.
Proper footwear is essential; choose boots with non-slip soles to reduce the risk of slipping on the roof or ladder. Additionally, use a securely anchored ladder for access and consider employing a safety harness when working at significant heights.
Keep the work area tidy to avoid tripping hazards. Ensure that tools and materials are stored safely and are within easy reach to minimize unnecessary movement on the roof.
Lastly, remember that roofs can become extremely hot, especially in warm weather. Stay hydrated and take breaks as needed to prevent heat exhaustion. When possible, plan your work for cooler parts of the day.
FAQ
What angle should a lean shed roof be?
A lean shed roof should generally have a pitch ranging from 1:12 to 4:12, with shallower pitches of 1:12 or 2:12 often used for roofs primarily designed to provide shade or shelter from the rain.
What is a good slope for a shed roof?
A good slope for a shed roof is typically around 7.5 degrees.
How do you felt a slanted shed roof?
To felt a slanted shed roof, start at the bottom edge and work upward, ensuring overlaps face upward so rainwater runs over them instead of underneath, and secure the felt with nails hammered through the top edge at 10cm intervals.
How does the climate impact the angle selection for a slanted shed roof?
The climate greatly influences the angle selection of a slanted shed roof with colder, snowier regions necessitating steeper slopes for efficient snowfall runoff, and warmer, dryer regions typically having shallower slopes.
What are the different materials suitable for constructing a slanted shed roof?
The different materials suitable for constructing a slanted shed roof include wood, asphalt shingles, metal, rubber, and green roofs.
Which methods can be employed to increase durability of a shed roof?
Increasing the durability of a shed roof can be achieved through regular inspections and maintenance, using high-quality roofing materials, installing proper insulation and ventilation, applying a protective coating, and ensuring proper pitch for drainage.


