Last updated on
Explore the fascinating world of roof crickets as we delve into various types, their functions, and how they enhance your roofing system’s performance.
Are you familiar with roof crickets? These triangular structures are essential components of a sloped roof. They divert water away from chimneys, vents, and other protrusions to prevent leaks and water damage.
But did you know that there are different types of roof crickets that serve different purposes? In this article, we’ll explore the various types of roof crickets and their functions. Whether you’re a homeowner or a roofing professional, understanding these structures can help ensure the longevity and effectiveness of your roofing system.
So let’s dive in!
Understanding Roof Crickets

Roof crickets are triangular structures that sit at the intersection of two sloping roof planes. They are designed to divert water away from chimneys, vents, and other protrusions on a roof.
Without them, rainwater would accumulate around these areas and eventually seep into your home or building’s interior.
Understanding how roof crickets work is essential for anyone who wants to maintain a functional roofing system. These structures come in different shapes and sizes depending on the type of roofing material used, local climate conditions, and building codes.
In general terms though they all serve one purpose: directing water away from vulnerable areas of your rooftop towards gutters or downspouts where it can be safely channeled off the structure.
Advantages of Roof Crickets
Firstly, they help prevent water damage by diverting rainwater away from chimneys, vents, and other protrusions on the roof. This is especially important in areas with heavy rainfall or snowfall where water can accumulate and cause leaks.
Secondly, roof crickets improve the overall aesthetic appeal of a building’s exterior by providing a seamless transition between different sections of the roof. They also add depth to the design and create interesting angles that enhance curb appeal.
Thirdly, properly designed and installed cricket systems can increase energy efficiency by improving ventilation in attics or crawl spaces. By allowing air to circulate freely under your roofing system through ridge-to-valley ventilation channels created by crickets; you reduce heat buildup during hot weather conditions which helps lower cooling costs.
Lastly but not least importantly; having well-designed cricket systems installed on your home will increase its resale value as it shows potential buyers that you have taken steps to protect their investment against future damages caused due to poor drainage management practices.
Design Guidelines for Roof Crickets
First and foremost, the cricket should be at least two feet wide and extend up the roof slope for a minimum of 12 inches above any penetration it diverts water from. This will help prevent water from seeping under shingles or other roofing materials.
The angle of the cricket should match that of your roof’s slope to allow for proper drainage. A good rule of thumb is that a cricket’s pitch should be equal to or greater than one-half (1/2) times your roof’s pitch.
It is also important to consider wind direction when placing crickets on your rooftop. Crickets must always be installed on the high side (upwind) of penetrations such as chimneys or skylights so that they can effectively divert rainwater away from these areas.
Construction Materials and Techniques
Metal is the most popular choice due to its durability and resistance to weathering. Copper or stainless steel are often used for their corrosion-resistant properties and aesthetic appeal.
Wooden crickets are also an option but require regular maintenance to prevent rotting or warping. Asphalt shingle crickets offer a cost-effective solution but may not last as long as other materials.
When it comes to construction techniques, there are two primary methods: built-in-place and pre-fabricated. Built-in-place involves constructing the cricket on-site using individual pieces of material that fit together like puzzle pieces.
Pre-fabricated roof crickets come in standard sizes and shapes that can be easily installed onto the roof surface with minimal cutting required. This method saves time during installation while ensuring consistent quality across all units.
Chimneys and Crickets
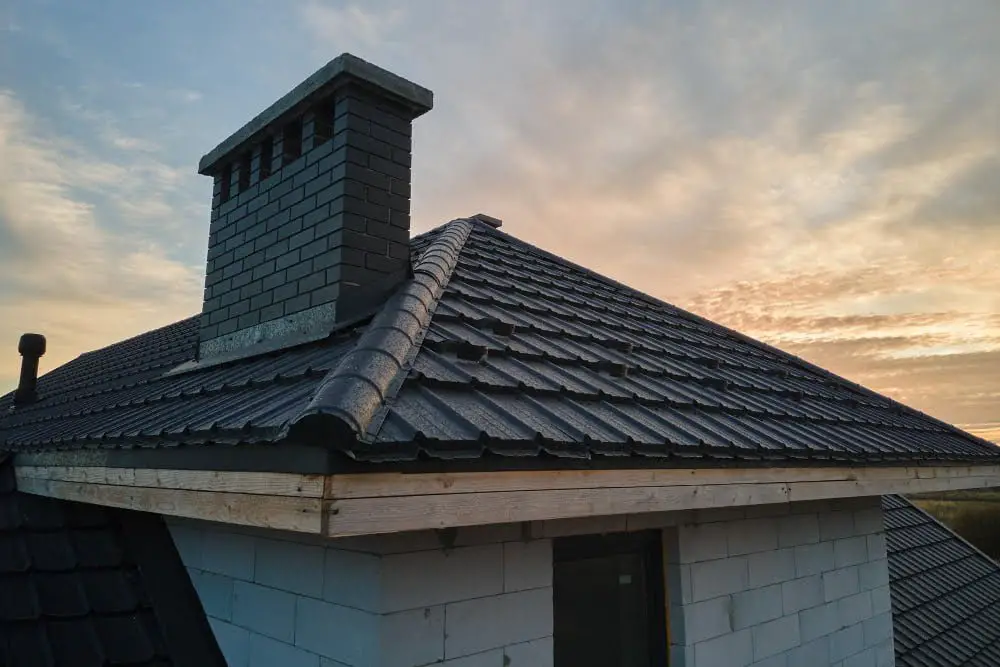
Chimney crickets are designed to divert water away from the chimney and prevent it from pooling on your roof. These triangular structures are installed on the uphill side of a chimney, creating a slope that directs water towards gutters or downspouts.
When installing cricket for your chimney, it’s important to consider its size in relation to your roofing system. A larger cricket may be necessary for taller chimneys or those located in areas with heavy rainfall or snowfall.
Proper flashing installation is crucial when working with chimneys and crickets. Flashing helps seal gaps between the chimney and roofing materials while also providing an additional layer of protection against moisture intrusion.
Dormer and Skylight Crickets
However, they can also pose challenges for roofing systems, particularly when it comes to water management. This is where dormer and skylight crickets come in.
Dormer crickets are triangular structures installed on the roof’s slope behind a dormer window or wall projection. They divert water away from the intersection of the dormer with the main roof plane, preventing leaks and potential damage.
Skylight crickets serve a similar purpose but are designed specifically for skylights. They direct rainwater away from these openings while ensuring proper ventilation around them.
Both types of cricket require careful design considerations to ensure optimal performance. The size, shape, angle of inclination must be tailored according to specific factors such as climate conditions or building codes requirements.
Ridge and Valley Crickets
Ridge crickets are installed at the peak of a sloped roof, where two sides meet to form a ridge. They help prevent water from pooling on top of the ridge by directing it towards adjacent slopes.
Valley crickets, on the other hand, are installed in areas where two sloping roofs meet to form a valley. These structures help channel rainwater away from this vulnerable area and prevent leaks or damage caused by standing water.
Both types of cricket require careful design considerations to ensure proper functionality. The size and shape must be tailored to fit specific roofing configurations while taking into account factors such as wind direction, rainfall intensity, snow load capacity among others.
Troubleshooting Roof Cricket Issues
One common problem is improper installation, which can cause leaks and water damage. If you notice any signs of water infiltration around your chimney or other protrusions on the roof, it’s essential to inspect the cricket for defects such as cracks or gaps in the flashing.
Another issue that may arise with roof crickets is poor maintenance. Over time, debris such as leaves and twigs can accumulate on top of them and clog up drainage channels.
This buildup prevents proper water flow away from chimneys or vents leading to potential leaks.
If you encounter any problems with your roofing system’s crickets, it’s best to consult a professional roofer who has experience working with these structures. They will be able to diagnose the issue accurately and recommend appropriate solutions based on your specific situation.
Proper Maintenance and Upkeep
Neglecting your roof crickets can lead to water damage, leaks, and even structural issues. Here are some tips for maintaining your roof crickets:
1. Inspect the cricket regularly: Check for signs of wear and tear such as cracks or missing shingles.
2. Keep the cricket clean: Remove debris such as leaves or branches that may accumulate on top of the cricket.
3. Ensure proper drainage: Make sure that water is flowing away from the chimney or vent by checking if there are no clogs in gutters or downspouts.
4. Repair damages immediately: If you notice any damage during inspection, repair it promptly before it worsens.
5. Hire a professional roofer for repairs: Roofing professionals have experience working with different types of roofs and can provide expert advice on how best to maintain your specific type of roofing system.
Steps for Installing Roof Crickets
Here are the steps involved in installing roof crickets:.
1. Measure and mark: The first step is to measure the area where you want to install a cricket, then mark it with chalk or a pencil.
2. Cut out the section: Using a saw, cut out the marked section of your roofing material.
3. Install flashing: Place flashing around all sides of your opening before installing any other materials.
4. Build frame structure: Construct an angled frame using wood or metal studs that will support your cricket’s shape and size requirements.
5. Attach sheathing boards: Nail sheathing boards onto this framework at regular intervals for added stability.
6. Install shingles/tiles/sheets: Once you have completed these steps, install shingles/tiles/sheets on top of everything else according to manufacturer instructions.
Roof Cricket Variations
Some of the most common roof cricket variations include hip crickets, saddle crickets, pyramid-shaped crickets, diamond-shaped or kite-style crickets.
Hip cricket is a type of roof cricket that diverts water away from hips or ridges where two sloping roofs meet at an angle.
Saddle cricket is another popular variation that directs water away from chimneys with a flat top surface to prevent pooling and leaks.
Pyramid-shaped roof crickets are ideal for larger protrusions such as skylights since they provide more coverage area than other types of roof structures. Diamond or kite-style shaped-roof structures are commonly used for smaller protrusions like vents.
When selecting a particular type of roofing structure for your home or building project, it’s essential to consider factors such as climate conditions in your area and the intended use of each space under the sloped roofs’ protection.
Compliance With Building Regulations
These regulations ensure that your roofing system meets safety standards and is structurally sound. Building codes vary by state and municipality, so be sure to check with your local authorities before starting any construction work.
Some of the key requirements for roof cricket installation include proper flashing around protrusions such as chimneys or skylights, adequate ventilation in the attic space, and appropriate slope angles for water runoff. Some areas may require specific materials or techniques for constructing crickets.
Working with a licensed contractor who is familiar with local building codes can help ensure that your project meets all necessary requirements. They can also provide guidance on obtaining permits if needed.
Selecting a Reliable Contractor
A qualified roofing professional can ensure that your cricket system is properly designed and installed to prevent leaks and water damage. But how do you choose the right contractor for the job? Here are some tips:
1. Look for experience: Choose a contractor who has extensive experience in designing and installing roof crickets.
2. Check credentials: Make sure the contractor has proper licensing, insurance, and certifications.
3. Read reviews: Check online reviews from previous customers to get an idea of their work quality.
4. Get multiple quotes: Compare quotes from different contractors before making a decision.
5. Ask questions: Don’t be afraid to ask questions about their process, materials used, warranties offered etc., as this will help you make an informed decision.
FAQ
What are crickets on a roof?
Crickets on a roof refer to triangular structures called saddles, designed to divert water behind roof protrusions like chimneys or skylights towards a drainage area.
Are roof crickets necessary?
Roof crickets are necessary for the longevity of your chimney and roof, as they efficiently direct water and debris into gutters.
What are crickets on a flat roof?
Crickets on a flat roof are V-shaped tapered accessories designed to disperse water and prevent ponding, thus reducing potential damage to the roof.
How do roof crickets help in water drainage?
Roof crickets help in water drainage by diverting water around obstructions, such as chimneys, to prevent pooling and leaks.
What materials are commonly used for constructing roof crickets?
Commonly used materials for constructing roof crickets include metal flashing, modified bitumen, and single-ply membrane.
How does the size and slope of a roof cricket impact its effectiveness?
The effectiveness of a roof cricket increases with its size and slope, as it ensures proper water drainage and prevents water leakage.


