Last updated on
Dive into the compelling reasons to choose valley metal roofs, because their unique design, easy installation, and low-cost maintenance offer unmatched advantages to homeowners.
Key takeaways:
- Open vs. Closed Valleys: Pros and cons
- Advantages of Metal Roof Valleys: Efficiency and durability
- Installation: Steps for flashing metal on different roof types
- Importance of Icing Water-Shield Barrier: Preventing leaks and damage
- Comparing Different Metal Valley Options: Consider factors like durability and cost
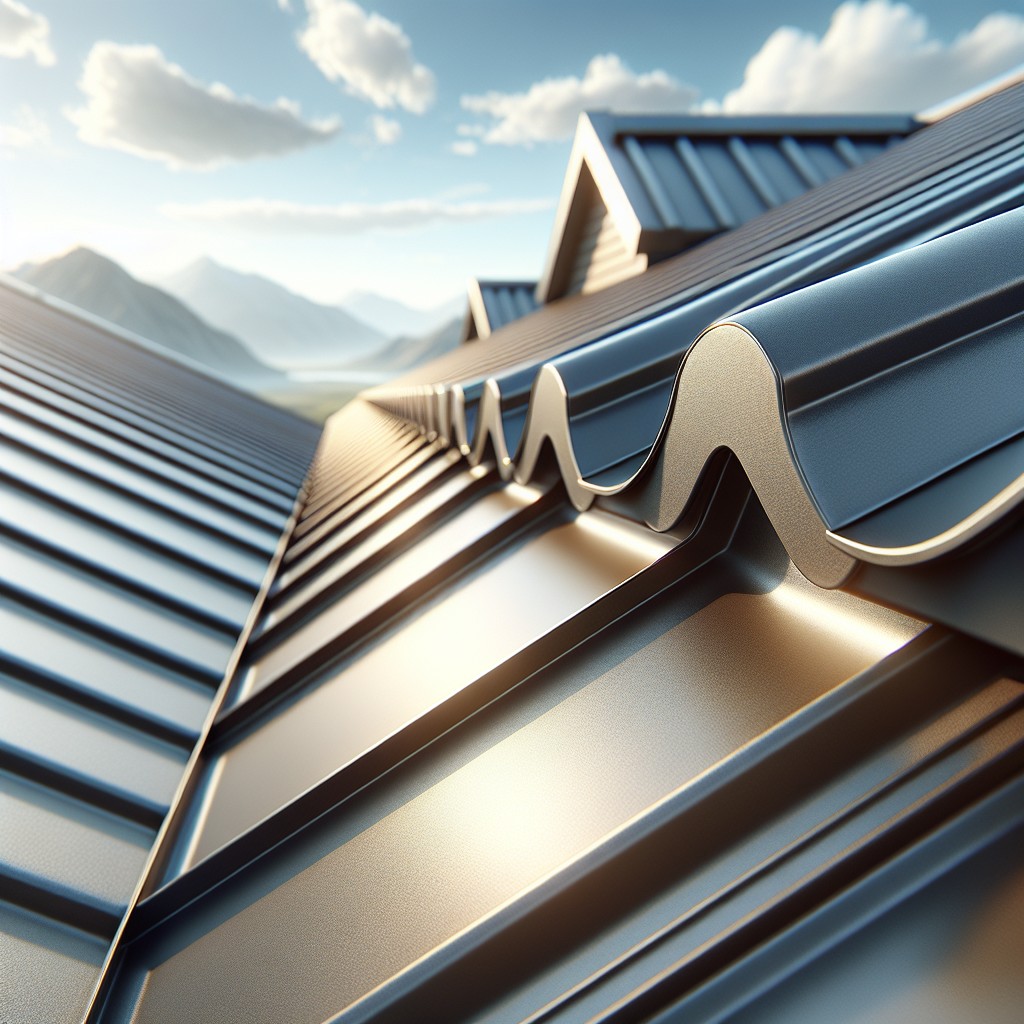
Types of Roof Valleys: Open Vs. Closed

Open valleys are characterized by a visible channel that allows water to run off more directly. They often feature a metal liner, which guides water down the roof and away from the structure. The metal strip is either exposed or covered with a durable material that matches the surrounding roofing. Open valleys provide efficient water drainage and are easier to clean and inspect for debris or damage.
In contrast, closed valleys consist of shingles or roofing material that extend across the valley, completely covering it. This creates a continuous look across the roofing surface, with no metal visible. Closed valleys are often favored for their aesthetic appeal; however, they can be more prone to clogs and require meticulous installation to ensure proper water flow.
Both systems must be installed with precision to prevent water intrusion and to promote longevity. The choice between open and closed valleys largely depends on the homeowner’s preference, the roof’s design, ambient weather conditions, and the advice of roofing professionals.
Advantages of Metal Roof Valleys
Metal valleys channel water more efficiently than traditional materials, allowing for faster drainage off the roof. They offer superior durability, resisting damage from extreme weather and UV exposure, which translates to a longer lifespan.
The sleek design of metal valleys provides a modern aesthetic, enhancing the overall appearance of the roof. Their low maintenance nature means less frequent repairs, ultimately saving homeowners time and money.
Additionally, metal is a recyclable material, which appeals to environmentally conscious consumers looking to minimize their ecological footprint.
Installation: Flashing Metal On Tile, Slate, and Metal Roofs
Proper installation of flashing in roofing valleys is crucial for preventing leaks, particularly where metal roofing interfaces with tile, slate, or other metal surfaces. The process involves several steps:
1. Building the Base: Begin by laying an underlayment, such as felt paper, over the roof decking. This serves as an additional moisture barrier.
2. Fitting the Flashing: Custom-fit your valley flashing to ensure it extends up and out from the valley center. For tile and slate, the flashing must accommodate the shape of the roofing materials.
3. Sealing Joints: Use a high-quality sealant between the valley flashing and the roofing material to create a watertight bond.
4. Securing the Flashing: Nail the flashing into place at the edges, while avoiding nailing through the center of the valley where water flows.
5. Ensuring Overlap: When layering sections of flashing, each piece should overlap the lower one by at least 6 inches to prevent water infiltration.
6. Accommodating Expansion: Metal expands and contracts with temperature changes. Make allowances for movement to prevent buckling, maintaining the roof’s integrity.
7. Finishing with Roofing Material: For a clean and secure fit, tile or slate should be cut and laid to match the contour of the metal flashing without obstructing the valley’s water flow.
Following these guidelines will fortify valleys against water intrusion and safeguard the longevity of your roofing system.
Importance of an Icing Water-Shield Barrier Underneath Metal Valleys
Proper installation of a water-shield barrier is crucial in safeguarding your roof’s longevity, particularly at the valleys where water collects and flows. An ice and water shield acts as a self-sealing membrane, which sticks to the roof decking and forms a continuous seal around nails or other penetrations. This barrier offers a secondary line of defense against water infiltration that can lead to leaks, rot, and mold, even under harsh weather conditions such as ice dams and wind-driven rain.
Furthermore, it provides protection while the primary roofing material is being installed, and in the case of any future damages to the upper layers. This shield is especially vital in regions with frequent freeze-thaw cycles, ensuring that your metal valleys remain as robust and leak-proof as the day they were installed.
Comparing Different Metal Valley Options
When evaluating metal valley materials, consider durability, cost, and compatibility with the existing roofing. Galvanized steel, a popular choice, offers strong resistance to corrosion and suits most budgets. Aluminum valleys, while lightweight and rust-proof, may be preferable in coastal areas due to their excellent resistance to saltwater corrosion. For a more premium look that ages to an attractive patina, copper is a high-end option known for its longevity and resilience. Zinc valleys also offer a unique aesthetic and corrosion resistance but can be more expensive. Installation methods vary, with some metals being easier to work with than others, influencing labor costs.
Selecting the right gauge—or thickness—of the metal is critical. Thicker options typically offer better durability, but come at a higher price point. Manufacturer specifications and recommendations are vital to follow to ensure the correct gauge for your particular roof.
Compatibility with the existing roofing materials is also paramount to prevent galvanic corrosion. Metals like copper can cause faster degradation of aluminum gutters and flashings if direct contact occurs.
Lastly, the finish of the metal—in terms of color, reflectivity, and texture—can impact both the aesthetic appeal and the energy efficiency of your home, with some finishes offering better UV reflectivity than others.
Challenges With Roof Valleys: Common Problems
Roof valleys are critical areas where two roof slopes meet, channeling water towards the gutters. Despite their importance, valleys face several common challenges:
- Debris Accumulation: Leaves, twigs, and dirt often gather in valleys, impeding water flow and potentially leading to leaks.
- Ice Dams: In cold climates, ice can build up in the valleys, forcing water under shingles and causing damage.
- Improper Installation: If valley flashing isn’t installed correctly, it can result in gaps or buckling, leaving the roof vulnerable to water penetration.
- Corrosion: Metal valleys, while durable, can corrode over time due to continuous exposure to water and harsh environmental conditions.
- Waterproofing Failures: Sealant around the valley can degrade, compromising the watertight integrity of the roofing system.
Monitoring these areas and performing regular maintenance is essential to prevent long-term damage to your roof.
Best Practices for Using Ice and Water Shield With Metal Roof Valleys
Ensuring long-term durability of metal roof valleys hinges on correct installation and the integration of an ice and water shield. To optimize protection, adhere to the following best practices:
- Begin by cleaning the deck to create a smooth, debris-free surface that enhances the shield’s adhesiveness.
- Install the ice and water shield directly onto the roof deck, centering it in the valley. Maintain uniformity; this shield acts as a secondary barrier against moisture infiltration.
- Overlap the edges of the shield by at least six inches, a critical step in creating a watertight seal.
- Press down firmly along the entire surface of the shield to eliminate air pockets and secure a bond strong enough to withstand environmental stressors.
- Avoid stretching the material, as tension may compromise the shield’s integrity and its ability to repel water effectively.
- Trim the shield carefully at the valley’s end, ensuring ample coverage without obstructing water flow at the eaves.
By paying special attention to these details, you can maximize the performance of your metal roof valleys and prevent water damage.
Recognizing Signs That Your Roof Valley May Need Repair
Early detection of issues in your roof valley can prevent extensive water damage. Pay attention to the following indicators:
- Visible Rust or Corrosion: Metal valleys should have a clean, uninterrupted surface. Rust may suggest that the material is nearing the end of its useful life.
- Water Stains on Interior Ceilings: If stains appear directly beneath the valley, this may indicate that water is penetrating the roof.
- Debris Accumulation: Leaves and other organic materials can trap moisture and cause the metal to deteriorate.
- Improper Water Flow: Water should channel smoothly down roof valleys. Obstructions or incorrect installation can result in pooling or backflow.
- Sealant or Caulking Deterioration: Inspect the edges of the valley metal; failing sealant could allow water infiltration.
- Visible Gaps or Damage: Any damage to the metal or a widening gap where the valley meets the roof panels could lead to leaks.
Identifying these signs promptly allows for timely repairs, maintaining the integrity of your roof.
Potential Disadvantages of Metal Valleys
While metal valleys offer durability and longevity, several drawbacks merit consideration:
1. Noise: Metal can amplify the sound of rain, which could be disruptive for some homeowners.
2. Cost: Metal materials and specialized labor for installation typically incur higher upfront costs than other valley options.
3. Expansion and Contraction: Temperature fluctuations can cause metal to expand and contract, potentially leading to structural stress or fastener issues over time.
4. Corrosion: Depending on the metal type and quality, valleys may be susceptible to rust or corrosion, especially in coastal areas with salt-laden air.
5. Compatibility: If not matched appropriately, metal valleys can experience galvanic corrosion when in contact with dissimilar metals, leading to premature failure.
Selecting the right material and ensuring proper installation are critical to mitigating these potential issues. Regular maintenance, such as clearing debris and inspecting for damage, also prolongs the life of metal valleys.
Detailed Guide for Fastening Valley Trim On a Metal Roof
To securely install valley trim on a metal roof, follow these steps:
- Measure and Cut Valley Trim: Accurately measure the valley length and cut the trim, allowing for a few inches of extra length for overlap at the bottom.
- Peel and Stick Underlayment: Lay down a high-quality, self-adhering underlayment along the valley. Make sure it’s centered and covers both sides of the valley evenly.
- Positioning the Trim: Center the valley trim over the underlayment in the valley. The wider part of the trim should face the bottom of the roof, allowing water to flow down smoothly.
- Secure the Valley Trim: Begin fastening from the top of the valley, using screws with neoprene washers for watertightness. Screws should be placed at 12-inch intervals along the edges of the trim.
- Overlap Joints: When needing to join two pieces of valley trim, overlap them by at least 6 inches. Apply sealant between layers for additional leak prevention.
- Ensure Straight Lines: Use a chalk line for guidance to keep fastening straight. This will not only ensure effectiveness but also maintain the aesthetic appearance of your roof.
- Hemming Edges: Hem the edges of the valley trim where they will meet the panels to prevent water from getting in between the layers.
- Trim and Secure the Panels: Fit roofing panels onto the valley trim, ensuring they properly overlap the valley flange. Trim panels accordingly, leaving room for expansion. Fasten the panels as recommended by the manufacturer.
Remember to always check with the specific guidelines provided by your metal roof and trim manufacturers, as procedures may vary depending on the product.
FAQ
What is valley metal on a roof?
Valley metal on a roof, also known as metal valley flashing, is a protective element that aids in draining water away from the building’s structure to prevent moisture damage.
Do roof valleys need metal flashing?
Yes, roof valleys should have additional underlayment lining, preferably a couple layers of roll roofing, though metal flashing isn’t mandatory in closed valleys.
Are metal valleys better?
Yes, metal valleys tend to hold up better over time, particularly when the rest of the roofing shingles are properly installed and functioning effectively.
Can you replace valley metal without removing shingles?
No, you cannot replace valley metal without removing the shingles, as they need to be removed for a minimum of 2 feet on each side of the valley at the eave in order to replace the underlayment beneath.
What materials are suitable for a metal valley roof?
Materials suitable for a metal valley roof include copper, steel, and aluminum.
How often should metal valley roofs be inspected?
Metal valley roofs should be inspected at least twice a year for optimal maintenance and longevity.
What are the common issues faced with metal valley roofs?
Common issues with metal valley roofs include material corrosion, poor installation leading to leaks, and debris buildup causing water damage.


