Last updated on
Learn how to install your own metal roof with step-by-step guidance to save money and enhance your home’s durability.
Key takeaways:
- Metal roofing is durable, energy-efficient, and can last 40-70 years.
- Safety precautions include wearing gloves, eye protection, and securing a sturdy ladder.
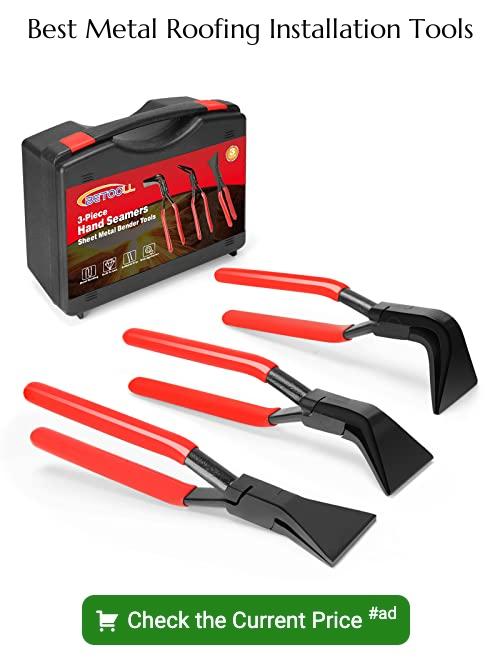
- Essential tools for metal roofing installation include metal snips, screw gun, and ladder.
- Key steps include measuring accurately, installing edging, laying metal panels, and using screws.
- Regular maintenance includes checking for wear, cleaning debris, and inspecting sealant and fasteners.
Benefits of Choosing Metal Roofing

Metal roofs are a stellar pick for DIY enthusiasts thanks to their longevity, durability, and energy efficiency. These roofs can last 40 to 70 years, significantly outperforming traditional asphalt shingles. They also stand strong against severe weather, including high winds, hail, and even fire.
Another huge perk is their ability to reflect solar radiant heat, which can help reduce cooling costs by up to 25%. For those looking to put a little extra money back in their pockets—metal roofing is a sound investment. Plus, many metal roofs are made from 30-60% recycled material and are 100% recyclable at the end of their life, making them a green option for the environmentally conscious.
Lightweight yet strong, they often don’t require the same level of structural support as heavier materials. This makes them a practical choice for DIY projects, reducing both labor intensity and installation time.
Safety Precautions for DIY Metal Roofing
Before you start hammering away, remember that while metal may be mighty, safety is mightier! When handling metal panels and tools, ensure you wear gloves to avoid cuts—because nobody enjoys an unexpected tribute to their own version of a horror movie.
Secure a sturdy ladder that doesn’t wobble, as dancing is best saved for solid ground, not several feet up in the air. Eye protection is a must because metal shavings don’t make for good eye drops.
Also, keep your work area free of debris and tools. A clean workspace not only keeps things efficient but prevents tripping over that sneaky wrench left on the ground. Metal roofing involves a lot of cutting and climbing, so avoid windy or wet conditions; battling the elements while on a roof adds an unnecessary level of difficulty—and roof surfing is not a recommended sport.
Finally, if you’re using electrical tools, make sure your using GFCI (Ground Fault Circuit Interrupter) protection to prevent electrical shocks. After all, the only shocking thing should be how good your roof looks when you’re done!
Tools and Materials Required
Before you can channel your inner roofing warrior, you’ll need to arm yourself with the right tools and materials. First up: metal panels or shingles, which will be the shining armor of your home. Make sure to measure your roof accurately so you can purchase the correct amount. You’ll also need underlayment, which acts like a cozy blanket under the metal, providing an extra layer of protection against moisture.
Don’t forget your tool belt! Essential gadgets include a tape measure, metal snips for trimming, a screw gun, and screws specifically designed for metal roofing to ensure a snug fit and avoid a rattling performance during windy concerts. A ladder and safety harness are non-negotiable knights in shining armor, ensuring you stay safe while performing your high-altitude acrobatics. Lastly, grab some sealant and a caulking gun to prevent pesky water dragons (leaks) from invading your castle (home).
Equipped with the right arsenal, you’re now prepared to tackle that roof with the confidence of a seasoned knight! Just don’t forget to keep your jests (jokes) handy to keep morale high.
Key Steps in Installing Metal Roofing
First, measure your roof to purchase the right amount of metal roofing panels. Accuracy is key to avoid the awkward moment of running short in the middle of your project. It’s like baking cookies without enough dough—just tragic!
Next, install the edging around the perimeter of the roof. This acts like a frame for your artwork—only it’s metallic and less likely to be hung in a gallery. Secure it properly to keep those panels in line and prevent water from doing a surprise invasion.
Then, lay down the metal panels. Start from the longest side of your roof and work your way across. Think of it as setting up dominoes, where each piece needs to precisely align for that satisfying finish—except hopefully your metal sheets won’t fall over with a flick.
Use screws to attach the panels to the roof frame. Remember, the goal is to keep them tight and secure, not to audition for a role in a horror movie with creepy creaking sounds. Place screws at intervals recommended by the manufacturer to maintain warranty and performance.
Lastly, overlap panels as directed. This isn’t just to create an artisanal look but to ensure there’s no pathway for water leaks. Overlapping is crucial—it’s the buddy system of roofing, where each panel looks out for the one next to it.
Throughout the process, double-check alignments and measurements. A little extra vigilance can prevent future headaches, and who wants metal roofing-induced migraines?
And there you have it! Follow these steps and not only do you get a sturdy roof, but also the eternal bragging rights of ‘I built it myself.’ Plus, think of all the dinner party anecdotes you’ll gather from this adventure!
Maintenance and Care of Metal Roofs
Maintaining your metal roof doesn’t require magical skills, just a bit of attention and care. Regularly check for any signs of wear or damage, especially after extreme weather conditions. Leaves, twigs, and other debris can accumulate, so it’s a good idea to clean these off promptly to prevent any blockages or water pooling.
Also, keep an eye on the sealant and fasteners. They should be intact and tight. If the sealant shows signs of cracking or the fasteners appear loose, replace them as needed to keep your roof weather-tight.
Lastly, to keep that shine on point, wash the roof occasionally with a mild soap and water solution, and rinse thoroughly. Just be sure to do your impersonation of a gentle rainstorm rather than a full-on hurricane when you’re up there with the hose.
By following these simple steps, your metal roof will continue to protect your home for years to come, not to mention that it will keep looking as snappy as the day you installed it.


