Last updated on
In this article, you will learn the necessary steps to successfully tie in a gable roof addition to your existing structure.
Key takeaways:
- Ridge, rafters, eave, gable end – key components of gable roof
- Roof pitch, material consistency, load analysis, drainage, ventilation – design considerations for gable roof additions
- Steps: prepare existing roof, match pitch, add ledger board, install rafters and decking, apply underlayment and flashing, match shingles
- Legal and regulatory aspects – building codes, permits, HOA approval
- Maintenance tips – regular inspections, check for wear, clear gutters, trim tree limbs, monitor attic ventilation
Understanding Gable Roof Structures

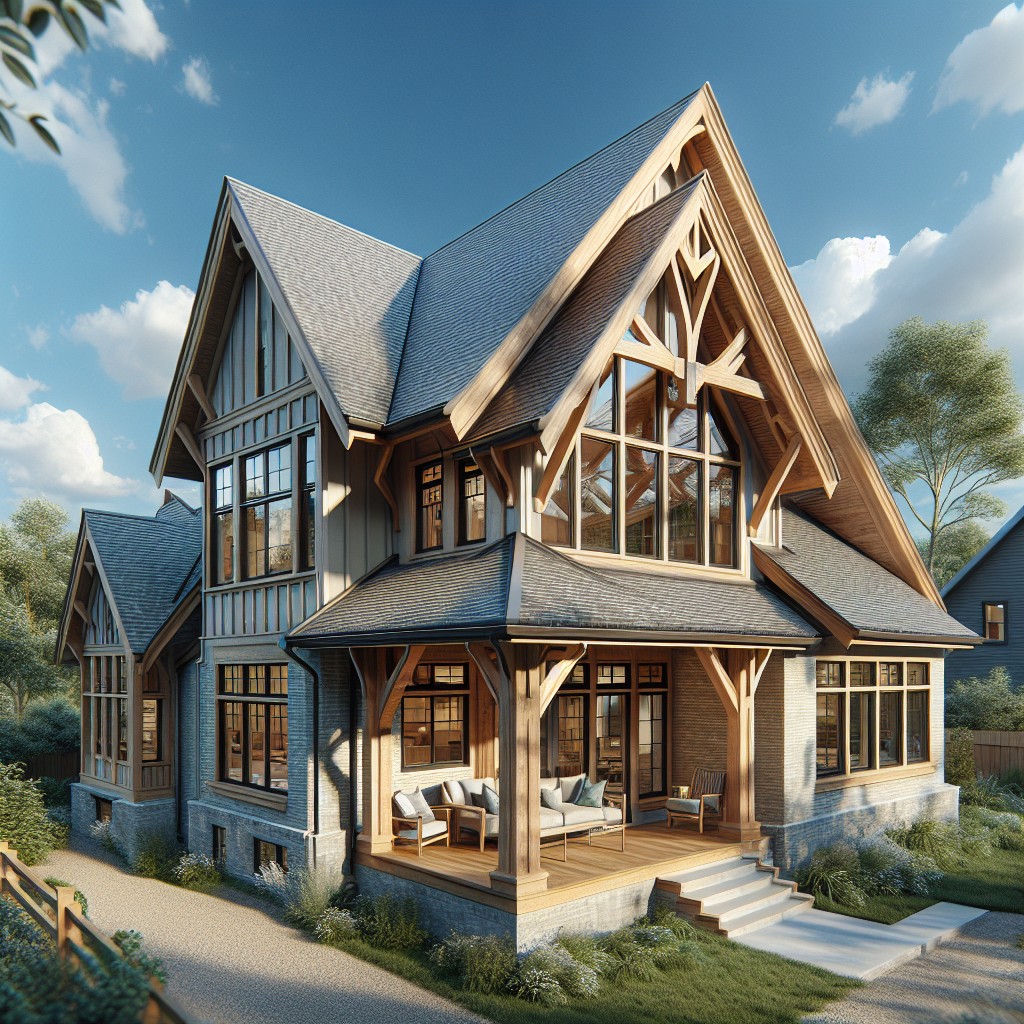
Gable roofs, characterized by their triangular shape, are among the most common roof styles due to their simplicity and effectiveness in shedding water and snow. The two sloping sides of a gable roof come together at the ridge, creating a peak. This design allows for additional attic space or vaulted ceilings, enhancing ventilation within the structure.
Identifying the key components of a gable roof is essential prior to an addition:
- Ridge: the highest horizontal edge where the two slopes meet.
- Rafters: the sloped beams that provide the framework and support the roof covering.
- Eave: the part of the roof that extends beyond the walls, providing protection for the sides of the house.
- Gable End: the wall where the gable roof comes to a point, often featuring the design’s triangular portion.
Understanding these elements ensures a seamless integration of the new structure with the existing roof, which is critical for achieving optimal functionality and aesthetics.
Design Considerations for Gable Roof Additions
When planning a gable roof addition, aligning with the existing structure’s aesthetic and functional facets is crucial.
- Roof Pitch Matching: The slope of the new section must mirror that of the original roof to ensure a seamless integration, thus maintaining structural integrity and visual harmony.
- Material Consistency: Use materials that match or complement the existing roofing to create a cohesive appearance, as well as to secure uniform aging and wear patterns.
- Load Analysis: An assessment of the existing building’s capacity to bear additional weight is essential. This includes evaluating support walls and foundation to prevent structural issues.
- Drainage System Integration: The addition must be designed to effectively merge with the current drainage system, reducing risks of water damage or pooling.
- Ventilation: Proper ventilation reduces the risk of condensation, which can lead to mold and rot. The new roof section should include soffit, ridge, or gable-end vents to align with current ventilation strategies.
Taking these factors into account assists in ensuring that the new addition is both convenient and complementary to the existing property.
Step-by-Step Process for Gable Roof Tie-In
Begin by preparing the existing roof by removing shingles, tiles, or other materials from the tie-in area to create a seamless joining point. Next, cut the rafters or trusses of the new gable roof to match the pitch of the existing roof, ensuring a snug fit. Attach a ledger board along the existing structure for additional support.
Proceed to install the new rafters, connecting them to the ledger board at one end and the ridge board at the other. Apply decking material over the new rafters, integrating it with the existing roof decking. Install underlayment and flashing to prevent water penetration at the intersection, commonly referred to as the valley. Match the new shingles to the old, starting from the bottom up, to achieve a consistent look.
Lastly, ensure proper ventilation is maintained or added in the new roof section to avoid moisture buildup. Throughout this process, maintain precise measurements and use appropriate construction techniques to ensure structural integrity and longevity of the roof addition.
Legal and Regulatory Aspects to Consider Before Construction
Before breaking ground on your gable roof addition, it’s imperative to navigate the tapestry of building codes and permits that govern construction practices. Local zoning laws dictate the allowable structures on a property and impose limits on height, setback, and lot coverage, which could influence the scale and positioning of your addition.
Obtaining a building permit is a non-negotiable step; it ensures the design complies with safety standards and often requires detailed plans for inspection.
Hiring a licensed contractor who is familiar with these regulations can simplify the process. They’ll account for vital factors such as load-bearing requirements and weatherproofing which need to be reviewed and approved before construction. Additionally, if your home is part of a homeowner’s association (HOA), securing their approval is crucial as they may have specific aesthetic or architectural guidelines.
Remember, adherence to these legal and regulatory standards is not only about compliance but also about ensuring the longevity and safety of your gable roof addition. It’s an investment in peace of mind, knowing that your construction aligns with professional and legal benchmarks.
Maintenance Tips for Newly Installed Gable Roof Additions
Regular inspections are crucial for the longevity of your new gable roof addition. It’s recommended to schedule inspections twice a year, typically in spring and fall, to identify any potential issues early on.
During these inspections, pay attention to the following:
- Check for any signs of wear or damage, such as cracked, curled, or missing shingles, which should be replaced promptly to prevent water infiltration.
- Ensure that the flashings—especially where the new addition ties into the existing structure—are intact and free from rust or damage to maintain a waterproof seal.
- Clear debris from the gutters and downspouts to prevent water buildup that can lead to leaks and water damage.
- Look for any signs of algae or moss growth on the shingles, which can be indicative of excess moisture; algae-resistant shingles can be considered for replacements if this is a recurring issue.
- Trim any overhanging tree limbs that could potentially damage the roof during storms or high winds.
- Check the attic space regularly for leaks, proper insulation, and adequate ventilation to avoid heat and moisture buildup that can compromise the roof structure.
By adhering to these maintenance tips, you can help ensure that your gable roof addition remains in good condition and continues to provide reliable protection for your home.
FAQ
How do you extend a gable roof?
To extend a gable roof, the side of the roof is removed, additional pieces of wood are attached to the existing rafters, and the roof is then refinished, a method particularly suitable for minor extensions that only add between 2 to 9 inches to the overhang.
How much does it cost to add a gable roof to an existing roof?
The cost to add a gable roof to an existing roof typically ranges from $9,000 to $13,500 for a 1,500 sq. ft. roof, equating to about $6 to $9 per square foot of roofing.
What are the key construction aspects to consider when extending a gable roof?
When extending a gable roof, key construction aspects to consider include the pitch or slope, roofing materials, truss design, local building codes, weather conditions, and structural support conditions to ensure stability and durability.
Can you tie a shed roof into a gable roof, and if so, how is the process carried out?
Yes, it’s possible to tie a shed roof into a gable roof, typically by constructing rafters from the shed roof that tie into the peak of the gable roof.
What waterproof measures should be taken when adding a gable roof to an existing roof?
When adding a gable roof to an existing roof, it is crucial to waterproof the junction point by employing methods like flashing installation, using sealant, and ensuring proper shingle overlap.


