Last updated on
Understanding how many screws to use per sheet of metal roofing is crucial because it directly impacts the sturdiness and longevity of your roofing structure.
Key takeaways:
- The recommended standard screw count per sheet of metal roofing is to place a screw every 24 inches along the panel’s side lap for panels 26 inches wide or more.
- Factors influencing the number of screws needed include panel design, roof size and panel width, roof pitch, manufacturer specifications, local building codes, environmental load, and edge and seam fastening.
- Ideal screw placement for metal roofing includes placing screws at the high points of the metal sheeting, close to the overlap edge, and positioning screws away from the metal sheet edges.
- Screws are preferred over nails for metal roofing due to their durability, holding power, resistance to wind uplift, and ease of disassembly for repairs or replacements.
- Insufficient screws in metal roofing can lead to increased risk of leakage, decreased wind resistance, structural weakness, voided warranty, and costly repairs and maintenance.
Standard Screw Count Per Sheet of Metal Roofing

The number of screws needed per sheet of metal roofing typically depends on the panel width and the spacing of the supporting structures, such as purlins or rafters. Industry standards generally recommend:
- For panels 26 inches wide or more, placing a screw every 24 inches along the panel’s side lap is advisable.
- At the ends of each panel, approximately 1-3 inches from the edge, screws should be placed every 8 to 12 inches.
- In cases of overlap between panels, it is common practice to fix every 12 to 16 inches with a screw.
Considering these spacing recommendations ensures secure attachment of each metal sheet, optimizing structural integrity and reducing potential for leaks. The right count is crucial for panels to withstand various environmental stressors, including wind uplift and thermal expansion.
Factors Influencing Screw Quantity

When determining the number of screws needed for metal roofing, a few key elements come into play, each impacting the final count:
1. Panel Design: Different metal roofing profiles, such as corrugated or standing seam, require different fastening patterns and amounts.
2. Roof Size and Panel Width: Larger roofs or those with wider panels could decrease the number of screws due to span capability but also increase it to ensure panel security.
3. Roof Pitch: Steeper slopes may demand more fasteners for additional security against gravity and weather forces.
4. Manufacturer Specifications: Always adhere to the recommended installation guidelines provided by the manufacturer for the best results and to maintain the warranty.
5. Local Building Codes: These regulations can dictate the minimum fastening requirements to meet safety and performance standards for a given region.
6. Environmental Load: High wind areas, heavy snowfall regions, and seismic zones can influence the number of screws to ensure sufficient hold and durability.
7. Edge and Seam Fastening: Edges and seams are critical points that usually require increased screw density to withstand wind uplift and potential leakage.
Understanding these factors helps in making an informed decision on the precise count of screws necessary for a secure and effective metal roof installation.
Ideal Screw Placement for Metal Roofing
Securing metal roofing involves precision in both screw count and placement. To ensure longevity and performance:
1. Ridge and Valley Placement: Place screws at the high points, or ridges, of the metal sheeting to prevent water from collecting around the screw holes.
2. Overlapping Panels: When overlapping metal sheets, it’s crucial to fix the screws close to the overlap edge to maintain a tight seal.
3. Edge Distance: Aim to position screws 1/2 to 3/4 inches away from the metal sheet edges to maintain structural integrity and prevent material deformation.
4. Panel Width Rule: For standard panels, a typical guideline is to place a screw approximately every 24 inches along the panel’s width.
5. Linear Footage Rule: General practice suggests using about 5-7 screws per linear foot of roofing. Adjust this based on local building codes and wind zone requirements.
The correct screw placement pattern ensures the most secure and weather-tight roof installation. Refer to manufacturer’s instructions and building codes for the specific screw pattern suited to your roofing material and style.
Weather Considerations and Screw Count
Different climates necessitate varying fastening approaches to maintain the durability and integrity of a metal roof. In high-wind areas, it’s crucial to increase screw density to enhance wind resistance. Similarly, regions with heavy snowfall require a robust fastening pattern that can support the additional weight without compromising the metal panels.
For coastal properties, selecting stainless steel screws to prevent corrosion from salty air is imperative. The recommended spacing for purlins may decrease to accommodate a greater number of screws needed for these environmental stressors.
When encountering frequent temperature fluctuations, thermal expansion and contraction of metal sheets must be considered. Fasteners should allow for some movement to avoid stressing the metal sheets, yet provide enough grip to prevent uplift or warping.
Adjusting screw count according to weather patterns not only secures the roofing material but also prolongs its lifespan and ensures it performs well under the stresses it will face throughout the year.
Corrugated Metal Panels Vs. Standing Seam Metal Roofing
Corrugated panels often call for exposed fasteners, with screws penetrating the material and securing it directly to the roofing structure. A common guideline is to use approximately 80 screws for an area of 100 square feet. Placement is critical, typically at the crest of the corrugation rather than the valley, to prevent water infiltration.
Standing seam systems differ in that they use concealed fastening clips, which allow the panels to expand and contract with temperature changes. These clips are attached to the seams of the panels, and therefore, the number of screws depends on the width and configuration of the panel seams, rather than a per-sheet calculation. Keep in mind that screws are used to attach the clips to the roof deck or structure and to secure the seams, amounting to fewer visible screws than in corrugated systems.
Screws or Nails: Which Is Preferred?
When securing metal roofing, the choice between screws and nails is important. Screws are generally favored for their durability and holding power. Unlike nails, which can become loose over time due to the expansion and contraction of metal, screws are designed to accommodate these movements without compromising the roof’s integrity.
The threaded bodies of screws provide better grip and resistance to wind uplift, making them the preferred choice in areas prone to extreme weather. Additionally, the use of screws allows for easier disassembly for repairs or replacements, offering a practical advantage over nails.
Roofing nails may be used for certain types of metal roofing applications, such as in concealed fastener metal panels, but they remain less common due to their lower performance in sustaining long-term adherence.
For optimal results, always select the correct type and length of screw specifically designed for metal roofing, ensuring a well-secured and long-lasting installation.
What Happens When You Don’t Use Enough Metal Roof Screws?
Insufficient screws in metal roofing can lead to several issues:
- Increased Risk of Leakage: Fewer screws mean fewer seals against moisture. Over time, water can seep through the gaps, causing leaks.
- Decreased Wind Resistance: Metal roofing relies on screws for stability. A lower screw count reduces the roof’s ability to withstand high winds, making it more susceptible to damage or even detachment.
- Structural Weakness: Optimal screw placement ensures equal distribution of weight and stress across the roof. Skimping on screws can create pressure points, compromising the roof’s integrity.
- Voided Warranty: Manufacturers specify screw counts for a reason. Non-compliance with installation guidelines often voids warranties, leaving you unprotected against potential defects or issues.
- Costly Repairs and Maintenance: Over time, the consequences of too few screws multiply, leading to more frequent maintenance calls and costlier repairs than if the roof had been properly secured in the first place.
What Is the Spacing for Screws On Metal Roofing?
Spacing for screws on metal roofing typically ranges between 12 inches to 24 inches along the roof’s purlins, which are the horizontal supports in the roof’s structure.
When securing metal panels, the screws are placed into the high seams of the metal roofing panels rather than the low areas to prevent water from pooling around the screw and causing leaks.
On the sides of the panels, the screw placement should be every 12 to 16 inches.
This pattern ensures maximum hold and stability for the roofing material.
In the case of the roof’s edge, the spacing is often reduced to 6 to 8 inches to combat the wind uplift that could potentially loosen the panels.
It’s important to consult the manufacturer’s guidelines, as some types of metal roofing panels might have specific requirements regarding the screw placement and spacing to maintain their warranty and ensure optimal performance.
Do You Screw Metal Roof On Ridge or Flat?
When it comes to securing metal panels to the roof’s deck, the most effective approach is to place screws in the flat areas of the panel. Here are a few reasons why this method is preferred:
- Reduced Leakage Risk: Screws positioned in the high seam or ridge can potentially lead to water infiltration. By sealing them on the flat, the risk of leaks around the screw penetrations is significantly minimized.
- Increased Washer Contact: The neoprene washers that accompany roofing screws achieve full contact in the flat part of the panel, ensuring a tighter seal, as opposed to the partial contact they would have on a ridge.
- Structural Integrity: Driving screws through the flat areas distributes the load more evenly across the roofing material, reducing the chance for deformation that can occur if screws are placed on the ridges.
- Compatibility with Flashing: Most flashing components are designed to work seamlessly with screws that are fastened through the flat parts of the metal panels, providing better overall water protection.
It’s crucial to follow the manufacturer’s recommendations on screw placement for optimal performance and longevity of your metal roofing system.
FAQ
How far apart should screws be in sheet metal?
The appropriate spacing for screws in sheet metal roofing should generally be about 12-24 inches apart.
How do you calculate roof screws?
To calculate the number of roof screws needed, multiply the square meters of your roof by the coverage area (for corrugated iron, it’s 0.762m as indicated by the 762 in the product name) and then multiply the result by 7.
Should metal roof screws go in flat or ridge?
Metal roof screws should be installed in the flat of the panel, not on the ridge, to ensure a proper seal.
What types of screws are best used for metal roofing installations?
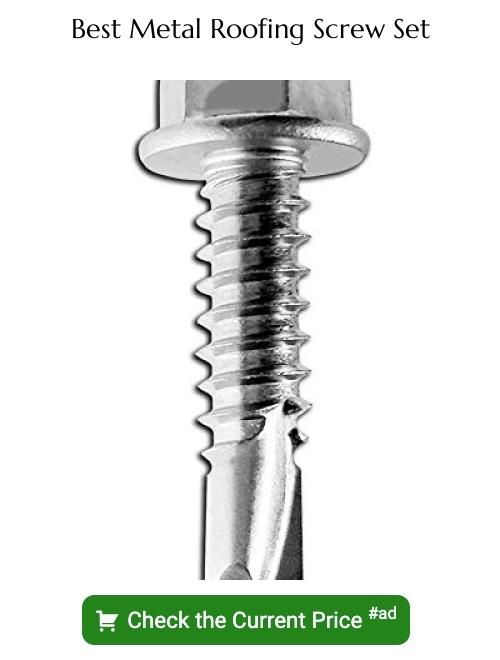
The best type of screws for metal roofing installations are self-drilling, galvanized, color-matched screws with a neoprene washer.
Does the type of metal used in roofing influence the number of screws required?
The type of metal used in roofing does not influence the number of screws required, as this is determined by the size, spacing, and layout of the roof, not the specific metal type.
What is the optimal screw placement pattern for maximum roof stability?
The optimal screw placement pattern for maximum roof stability is evenly spaced in rows and columns with a screw at each ridge and valley of the roofing profile.
Related
- Screw Pattern for Corrugated Metal Roofing: Comprehensive How-To Guide
- Proper Placement of Screws on a Metal Roof: Ultimate Guide
- How to Calculate Roof Area with Pitch: Easy Method to Determine Your Roof’s Dimensions
- How to Install Metal Roofing Over Shingles: Step-by-Step Process
- Shingle Calculator: How to Estimate Roofing Materials Accurately

