Last updated on
Discover the proper placement and techniques for securing screws on your metal roof to ensure long-lasting durability and protection.
Have you ever wondered where to put screws on a metal roof? It’s a question that many homeowners and DIY enthusiasts ask themselves when installing or repairing their roofs. The answer may seem simple, but it’s crucial to get it right to avoid leaks and other issues down the line.
In this article, we’ll explore the different factors that come into play when deciding where to put screws on a metal roof. So grab your coffee, sit back, and let’s dive in!
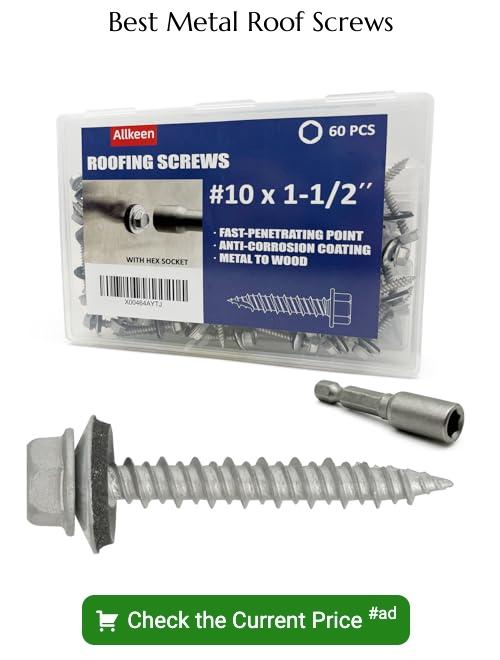
Types of Metal Roof Screws
Each type has its unique features and benefits that make them suitable for specific applications. Some of the most common types of metal roof screws include:
1. Woodgrip Screws: These screws have a sharp point and coarse threads designed to penetrate wood substrates easily.
2. Self-Drilling Screws: As their name suggests, these screws can drill through metal without pre-drilling holes.
3. Stitch Screws: These are self-tapping fasteners with a washer attached to create an effective seal against water penetration.
4. Lap-Tek® Screw System: This is a concealed fastener system that uses specially designed clips instead of exposed screw heads for aesthetic purposes.
5. Pancake Head Screw System: This system uses low-profile pancake head screws that sit flush with the surface they’re installed in, creating an unobtrusive look while still providing secure attachment points.
Choosing the right type of screw depends on various factors such as substrate material, weather conditions in your area, and personal preferences regarding aesthetics or ease-of-installation requirements.
Proper Screw Placement
The placement of screws depends on various factors, including the type of metal roofing material, pitch or slope angle, weather conditions in your area, and local building codes.
Generally speaking, screws should be placed at every rib or corrugation for maximum support. This means that you’ll need more screws for a low-pitch roof than a high-pitch one since there are more ribs to secure.
It’s also essential to avoid placing screws too close together as this can cause stress points on the panels and lead to leaks over time. On average, screw spacing should be between 12-24 inches apart depending on panel length and thickness.
Another factor that affects proper screw placement is wind uplift resistance requirements in your area. Local building codes may require additional fasteners along eaves or edges where wind uplift forces are highest.
Choosing the Right Screw Placement
The first step in choosing the right screw placement is to determine what type of metal roofing you have. Different types of panels require different spacing and fastening methods, so it’s essential to consult with your manufacturer or installer before starting any work.
Another factor to consider when choosing the right screw placement is wind uplift resistance. High winds can cause significant damage if screws are not placed correctly, leading to leaks and even complete panel failure.
To prevent this from happening, make sure that screws are spaced according to local building codes and industry standards.
Lastly, it’s important always to use high-quality screws made specifically for metal roofing applications. These screws should be corrosion-resistant and able withstand extreme weather conditions without breaking down over time.
Screw Spacing Guidelines
The first thing to consider is the type of panel you’re using. Different panels have different requirements for screw placement and spacing.
For example, if you’re using corrugated metal panels, the screws should be placed in the valleys between each corrugation. This will help prevent water from seeping through and causing leaks.
As a general rule of thumb, screws should be spaced no more than 24 inches apart along the length of each panel. However, this can vary depending on factors such as wind load requirements or snow loads in your area.
It’s also important to note that proper screw spacing is crucial for maintaining your roof’s warranty coverage. If screws are not installed according to manufacturer specifications or local building codes, it could void any warranties associated with your roofing materials.
Importance of Screw Spacing
It ensures that the panels are securely fastened to the structure and can withstand harsh weather conditions. The distance between screws depends on several factors, including panel thickness, wind uplift requirements, and local building codes.
If you space your screws too far apart, it can cause the panels to warp or buckle under pressure from high winds or heavy snow loads. On the other hand, if you place them too close together, it may weaken the structural integrity of your roof by creating stress points in areas where there should be none.
To determine proper screw spacing for your metal roofing project consult with a professional contractor who has experience working with metal roofs in your area. They will take into account all relevant factors such as climate zone and expected wind speeds before recommending an appropriate screw pattern for optimal performance.
Weather Considerations for Screw Placement
Different climates and weather patterns can affect the performance of your screws over time. For example, if you live in an area with high winds or heavy snowfall, you’ll need to ensure that your screws are placed securely and at the right spacing to withstand these conditions.
In areas with high humidity or frequent rainstorms, moisture can accumulate around poorly sealed screws and cause rusting or corrosion. This is why it’s essential to use proper sealing techniques when installing metal roof screws.
On the other hand, if you live in a dry climate where temperatures fluctuate significantly between day and night (such as desert regions), expansion and contraction of metal panels may occur due to thermal cycling. In such cases, choosing appropriate fasteners that allow for movement without compromising structural integrity is important.
Sealing Screws for Weather Resistance
The other crucial factor in ensuring a leak-free roof is sealing the screws against water infiltration. Even if you’ve placed your screws correctly, failing to seal them can lead to costly repairs and damage down the line.
To prevent this from happening, it’s essential to use high-quality sealant that’s specifically designed for metal roofs. Butyl tape or silicone caulk are two popular options that work well in most weather conditions.
Before applying any sealant, make sure your screw heads are clean and dry. Then apply a small amount of butyl tape or silicone caulk around each screw head before tightening them down fully.
It’s also important not to over-apply the sealant as too much can interfere with proper ventilation under your roofing panels and cause moisture buildup inside your attic space.
Overtightening or Undertightening: Finding the Balance
Overtightening can cause damage to the panels or even strip the screw threads, while undertightening can lead to leaks and other issues. So how do you find that sweet spot?
The key is using a torque wrench or drill with an adjustable clutch setting. This will allow you to tighten each screw just enough without going overboard.
It’s also important not to rely solely on your own strength when tightening screws as this can vary from person-to-person.
Another factor that affects tightness is temperature changes throughout the day and seasonally; therefore, it’s essential always checking for any loose screws during regular maintenance checks.
To Pre-Drill, or Not to Pre-Drill?
Pre-drilling involves creating a hole in the metal panel before inserting the screw, which can make installation easier and prevent damage to the panel.
However, some experts argue that pre-drilling can weaken the structural integrity of the panels and increase their susceptibility to wind uplift. If you’re using self-tapping screws designed for use without pre-drilled holes, there may be no need for this step.
Ultimately, whether or not you should pre-drill depends on several factors such as your specific roofing material and screw type. It’s always best practice to consult with a professional roofer or manufacturer guidelines before making any decisions about drilling into your metal roof panels.
Fastening Metal Roof Panels
The most common method for fastening metal roof panels is through exposed or hidden fasteners. Exposed-fastener systems are more affordable but less durable than their hidden counterparts.
Exposed-fastener systems require screwing the panel directly into the underlying structure, leaving visible screw heads on top of each panel. While this system is easier to install, it can be prone to leaks over time due to weather exposure.
On the other hand, concealed-fastener systems hide screws under overlapping panels or clips that attach them securely without penetrating through them. This type of system provides better protection against water infiltration and wind uplift resistance while giving a sleeker appearance.
Ridge Cap Installation
Proper installation is crucial to ensure that your ridge cap stays in place and provides adequate protection against weather elements.
When installing ridge caps, it’s important to use screws that are long enough to penetrate through both sides of the metal panels and into the underlying structure. This will help prevent wind uplift from dislodging or damaging your ridge cap.
To install a ridge cap on a metal roof, start by measuring and cutting your panels to size. Then, position them over the peak of your roof so that they overlap each other by at least two inches on either side.
Next, secure each panel with screws placed along its edges using proper spacing guidelines. Be sure not to overtighten these screws as this can cause damage or distortion in your panels.
Once all panels have been secured in place with their respective fasteners according to manufacturer instructions (usually self-tapping sheet-metal screws), apply sealant between overlapping sections for added weather resistance protection against water infiltration under high winds or heavy rain conditions.
Gable and Sidewall Trim Screws
These areas are particularly vulnerable to wind uplift and water infiltration, so you want to make sure they’re properly fastened. The type of screw you use will depend on the thickness of your trim material and whether or not it’s pre-drilled.
For thinner trims (less than 0.025 inches), self-tapping screws with a sharp point are recommended for easy installation without pre-drilling. For thicker trims (up to 0.050 inches), drill-point screws may be necessary for easier penetration.
It’s important not to overtighten these screws as this can cause distortion in the trim material or even damage surrounding panels if they’re too close together. Follow manufacturer guidelines for spacing between each screw, typically around six inches apart along the length of each piece of trim.
Valley Flashing Screw Placement
It’s a piece of metal that runs along the valleys where two roof planes meet, directing water away from the seams and into gutters or downspouts. Proper screw placement on valley flashing is crucial to ensure it stays in place and does its job effectively.
When installing screws on valley flashing, it’s important to avoid placing them too close to the edge as this can cause leaks over time. Instead, screws should be placed at least 1 inch away from the edge and spaced evenly apart according to manufacturer guidelines.
It’s also recommended that you use rubber washers under each screw head for added weather resistance. This will help prevent water from seeping through gaps between the screw heads and valley flashing during heavy rain or snowfall.
Make sure not to overtighten screws when securing valley flashings as this can damage both your roofing material and underlying structure over time due to thermal expansion/contraction cycles caused by temperature changes throughout seasons.
Pipe Flashing and Penetrations
Proper screw placement is crucial in ensuring that these areas remain watertight. When installing screws for pipe flashing, make sure they are placed at the base of the flange and spaced evenly around the circumference of the pipe.
For larger pipes or multiple pipes grouped together, additional screws may be necessary.
Penetrations such as vents or skylights also require special attention when it comes to screw placement. It’s important to follow manufacturer guidelines for fastening these components securely while still allowing for expansion and contraction due to temperature changes.
In addition to proper screw placement, using a high-quality sealant around penetrations can provide an extra layer of protection against water infiltration. Be sure not to overtighten screws when sealing around penetrations as this could cause damage or cracking in surrounding materials.
Screw Installation Best Practices
First and foremost, make sure that the screw is properly seated in the panel’s pre-drilled hole before tightening it down. This will prevent any damage to the panel or washer and ensure a secure fit.
It’s also important not to overtighten or undertighten your screws. Over-tightening can cause damage to both the screw and panel, while under-tightening can lead to leaks due to gaps between panels.
Another best practice is using sealant tape or caulk around each screw head for added weather resistance. This will help prevent water from seeping into your roof through small gaps around each fastener.
Be sure always use appropriate tools when installing metal roofing screws such as drill bits with stop collars set at proper depth settings for consistent results across all of your fasteners.
Tools for Metal Roof Screw Installation
Here are some of the most important tools you’ll need for a successful installation:
1. Power drill: A power drill with a screwdriver bit is necessary for driving in screws quickly and efficiently.
2. Screw gun: A screw gun can be used instead of a power drill and allows for faster installation while reducing fatigue.
3. Magnetic hex driver: This tool helps hold screws in place while they’re being installed, preventing them from falling out or getting lost.
4. Metal snips/shears: These cutting tools are needed to trim panels as necessary during installation.
5. Tape measure and chalk line: Accurate measurements ensure proper placement of panels and fasteners, so these two items should always be on hand during an install job.
6. Safety equipment (gloves, safety glasses): Always prioritize safety when working on any roofing project by wearing appropriate protective gear such as gloves and safety glasses.
Common Mistakes to Avoid
These mistakes can lead to leaks and other issues down the line. One of the most common mistakes is using the wrong type of screw for your metal roofing material.
It’s essential to choose a screw that matches your roof’s thickness and material.
Another mistake is overtightening or undertightening screws during installation. Over-tightened screws can strip out or damage the panel, while under-tightened ones may not provide enough support for your panels.
Not following proper spacing guidelines is another mistake many homeowners make when installing their metal roofs’ fasteners. Proper spacing ensures even weight distribution across all panels and prevents buckling or warping over time.
Lastly, failing to seal each screw hole with an appropriate sealant after installation leaves room for water infiltration through gaps around each fastener head leading up into your home’s interior space.
FAQ
Where are screws placed on metal roof?
Screws are placed on the flat of a metal roof, as it offers a solid wood surface beneath the metal panel, resulting in a safer, tighter, and more secure seal.
Can I screw metal roofing directly on plywood?
Yes, you can screw metal roofing directly on plywood; however, it is best to use a roofing felt layer between the metal roofing and the bare plywood for optimum results.
What is the recommended spacing between screws for metal roofing?
The recommended spacing between screws for metal roofing is every 12 to 16 inches.
How can I properly align screws to prevent leaks on a metal roof?
To prevent leaks on a metal roof, properly align screws by ensuring they are perpendicular to the surface and tightened securely without overtightening.
Are there specific types of screws recommended for metal roof installations?
Yes, self-tapping screws with neoprene washers are recommended for metal roof installations.


