Last updated on
Discover the essential steps to successfully install gutters on a metal roof by following our comprehensive guide that simplifies the process for you.
As a homeowner, you know that having a sturdy and reliable roof is crucial for protecting your home from the elements. But did you know that gutters play an equally important role in keeping your home safe? Gutters help to direct rainwater away from your roof and foundation, preventing water damage and costly repairs.
If you have a metal roof, you may be wondering how to properly install gutters without damaging your roof’s integrity. In this article, we’ll walk you through the steps of installing gutters on a metal roof so that you can keep your home safe and dry all year round.
Benefits of Gutters On Metal Roofs
Installing gutters on your metal roof can provide numerous benefits that will help protect your home from water damage and other issues.
One of the primary benefits of gutters is that they direct rainwater away from your roof and foundation. Without proper drainage, rainwater can accumulate on your roof or seep into the ground around your foundation, causing structural damage over time.
In addition to preventing water damage, gutters also help to keep debris such as leaves and twigs out of the gutter system. This reduces clogs in downspouts which could lead to overflowing water during heavy rainfall.
By installing a gutter system on a metal roof you not only increase its lifespan but also improve its overall functionality by protecting it against rusting caused by standing water or moisture accumulation at joints between panels.
Assessing Your Roof
A thorough inspection will help you identify any potential issues that may affect the installation process or cause problems down the line. Start by checking for any signs of damage, such as cracks or rust spots in your metal roofing material.
If there are areas with significant damage, it’s best to repair them before proceeding with gutter installation.
Next, examine the slope and pitch of your roof to determine how water flows off its surface. The angle at which rainwater runs off is crucial when selecting a gutter system that can handle heavy rainfall without overflowing or clogging up.
Take note of any obstacles like chimneys and skylights that could interfere with proper gutter placement and plan accordingly.
Tools and Materials Required
Here are some of the items you’ll need:
- Tools:
- Ladder
- Tape measure
- Chalk line
- Drill with bits and drivers
- Tin snips or a saw for cutting gutters
- Level
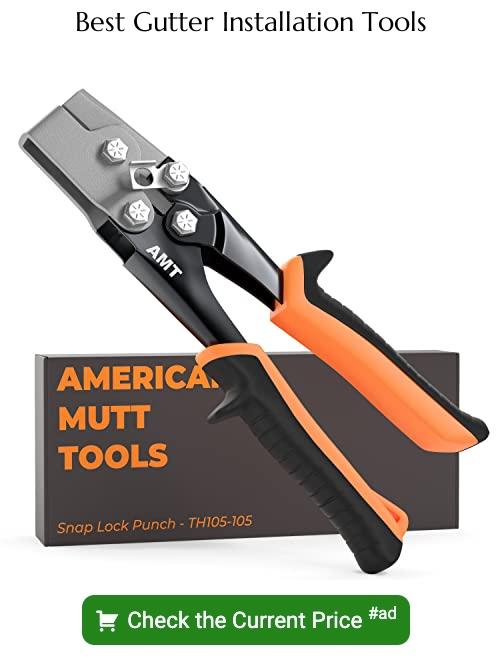
Materials: – Gutter sections (aluminum or steel) – End caps – Downspouts – Elbows – Gutter hangers/brackets • Hidden hangers • Spike-and-ferrule hangers • Strap hangers • Roof-mounted brackets.
Make sure that you have all these tools and materials before starting the installation process. This will help ensure that everything goes smoothly, without any unnecessary delays or trips to the hardware store.
Gutter Material Selection
The most common materials used for gutters include aluminum, copper, and steel. Each of these materials has its own unique advantages and disadvantages.
Aluminum is a popular choice because it is lightweight, durable, and resistant to rusting. It also requires minimal maintenance and can be painted to match the color of your roof or home’s exterior.
Copper gutters are known for their beauty as they develop a natural patina over time that adds character to any home’s exterior. They are also highly durable but come with a higher price tag than other gutter materials.
Steel gutters offer excellent durability but require regular maintenance due to their tendency towards rusting if not properly coated or treated with galvanization.
Measuring Roof Dimensions
Measuring the length and width of each section of your roof will help you determine how much gutter material you’ll need for installation. To get started, use a measuring tape to measure the length and width of each section from end to end.
Be sure to add an extra inch or two for overlap when connecting gutter sections together.
If your metal roof has multiple levels or angles, take measurements at different points along each slope as well as at any corners where slopes meet. This will ensure that you have accurate measurements for all areas that require gutters.
Once you’ve measured all sections thoroughly, calculate their total lengths and widths so that you know how much gutter material is required in total before purchasing supplies. Accurate measurement is crucial because having too little or too much material can lead to costly mistakes during installation.
Determining Gutter Size
The size of your gutters will depend on several factors, including the amount of rainfall in your area and the pitch or slope of your roof. In general, larger roofs with steeper pitches require larger gutters to handle a greater volume of water.
To calculate gutter size accurately, you’ll need to know two things: first is how much rainwater falls on an average day in inches; second is how many square feet are covered by each downspout opening. Once you have these figures at hand, use a gutter sizing chart or consult with a professional installer who can help guide you through this process.
Choosing the Right Gutter System
First and foremost, you’ll want to select gutters that are compatible with your specific type of metal roofing material. For example, if you have a standing seam metal roof, you may need specialized brackets or hangers designed specifically for this type of roofing.
Another important consideration is the size and capacity of the gutter system. You’ll want gutters that can handle heavy rainfall without overflowing or becoming clogged with debris.
Consider whether you need additional features such as leaf guards or downspout extensions.
Think about aesthetics when selecting your gutter system. Gutters come in a variety of colors and styles so choose one that complements the look of your home’s exterior.
Purchasing Gutter Supplies
When shopping for gutter supplies, it’s important to keep in mind that quality matters. Investing in high-quality gutters and accessories will ensure that your system lasts longer and performs better over time.
When purchasing gutter supplies, consider buying from a reputable supplier who offers a wide range of products at competitive prices. Look for suppliers who specialize in roofing materials or home improvement products as they are more likely to carry a variety of options suitable for metal roofs.
In addition to gutters themselves, you’ll also need brackets or hangers designed specifically for use with metal roofs. These should be made from durable materials such as stainless steel or aluminum so they can withstand harsh weather conditions without rusting or corroding.
Don’t forget about downspouts! Downspouts come in various sizes and styles depending on your needs; make sure you choose one that matches the style of your home while still providing adequate drainage capacity.
Preparing the Installation Site
This step is crucial because it ensures that your gutter system will function correctly and last for years to come. The first thing you need to do is clean out any debris from the area where you plan on installing the gutters.
This includes removing leaves, twigs, and other materials that may have accumulated in your roof’s valleys or eaves.
Next, inspect the fascia board along which you’ll be attaching your gutter brackets. Make sure there are no signs of rot or damage as this can compromise how well they hold up over time.
Check for any obstructions such as electrical wires or tree branches that could interfere with proper water flow through the gutters once installed.
Installing Gutter Brackets
Gutter brackets are essential components that hold the gutters in place along your roofline. To install them correctly, you’ll need a drill with a metal bit and screws.
Begin by marking where each bracket will be installed on your fascia board or rafter tails using chalk or pencil marks. The spacing between each bracket should be no more than 24 inches apart to ensure proper support for the gutters.
Next, use a drill with a metal bit to create pilot holes at each marked location on your fascia board or rafter tails. Then attach the gutter brackets using screws through these pilot holes.
Make sure that all of your gutter brackets are level and securely fastened before proceeding with further installation steps.
Cutting Gutter Sections
Cutting gutter sections can be a bit tricky, but with the right tools and techniques, you can get it done quickly and accurately.
To begin cutting your gutter sections, measure the length needed for each section using a tape measure. Then use tin snips or a hacksaw to make precise cuts along the marked lines.
Be sure to wear gloves when handling sharp metal edges.
It’s important that each section fits snugly against adjacent pieces without any gaps or overlaps. This will ensure proper water flow through the gutters without leaks or blockages.
If you’re not confident in cutting gutter sections yourself, consider hiring a professional installer who has experience working with metal roofs and gutters.
Connecting Gutter Segments
Begin by inserting one end of the first section into the next section and secure them with screws or rivets. Make sure that they are tightly connected so that water doesn’t leak through any gaps.
If you’re using a snap-together system, simply snap each segment together until they click into place. Be careful not to force anything as this can cause damage or misalignment.
When connecting gutter segments, it’s important to ensure that there is a slight slope towards the downspout for proper drainage. Use a level tool while attaching each segment and adjust accordingly if necessary.
Continue connecting all of your gutter segments until you reach the end point where your downspout will be installed. Once all sections are securely attached, double-check for any leaks before proceeding with installing additional components such as end caps and guards.
Sealing Gutter Joints
Sealing is an essential step in preventing leaks and ensuring that your gutters function correctly. To seal gutter joints on a metal roof, you will need silicone caulk and a caulking gun.
Start by applying a generous amount of silicone caulk along the inside of each joint where two sections meet. Use your finger or a putty knife to smooth out any excess caulk and ensure that it covers all gaps between the sections.
Be sure to let the caulk dry completely before testing for leaks or adding water flow through downspouts. It’s also important to check for any missed spots after installation as well as during regular maintenance checks throughout every season.
Installing Downspouts
Downspouts are essential for directing water away from your home’s foundation and preventing erosion. To install a downspout, first measure the distance between the gutter outlet and where you want to place your downspout.
Cut a hole in the gutter at that point using tin snips or a drill with an appropriate attachment.
Next, attach an elbow joint to direct water towards where you want it to go – either into another section of guttering or directly onto splash blocks on the ground below.
Then cut a length of pipe that will reach from this elbow joint all the way down to ground level (or wherever else you need it). Attach this pipe securely using brackets every few feet along its length.
Add another elbow joint at ground level if necessary so that water is directed away from your home’s foundation.
Attaching End Caps
These are essential components that prevent water from flowing out of the gutter system at its ends. To install them, first, clean the inside of each gutter end with a rag or brush to remove any debris or dirt.
Next, apply a bead of silicone sealant along one side of an end cap and press it firmly onto one end of your gutter section. Repeat this process for all remaining sections until all gutters have been capped off.
It is important to ensure that each cap is securely attached so that they do not come loose during heavy rainstorms or high winds. Once you’ve finished attaching all your caps, inspect them carefully for any gaps where water could escape and reapply sealant as needed.
Adding Gutter Guards
Gutter guards are designed to keep leaves, twigs, and other debris out of your gutters while allowing water to flow freely through the system.
There are several types of gutter guards available on the market today. Some attach directly onto the top of your gutters and use a mesh or screen material that allows water in but keeps everything else out.
Others fit inside your existing gutters and use a curved design that directs leaves and other debris over the edge while allowing water in.
When selecting gutter guards for metal roofs, make sure they’re compatible with both materials so as not to damage either one during installation or removal later on down the line.
By adding gutter guards after installing new metal roof gutters, you’ll ensure that they remain free-flowing all year round without requiring constant cleaning or maintenance.
Checking for Leaks
Even the smallest leak can cause significant damage to your home’s foundation and walls over time. To check for leaks, wait until it rains and then inspect the gutters carefully.
Look for any signs of water dripping or pooling around the gutter system or downspouts.
If you notice any leaks, mark their location with chalk so that you can easily find them later when repairing them. Once you have identified all of the problem areas, dry off the affected sections thoroughly using a towel or cloth.
Next, apply silicone caulk along each seam where two pieces of gutter meet and at every joint between downspouts and gutters as well as end caps if necessary. Allow ample time for drying before testing again during another rainfall event.
Gutter Maintenance Tips
Neglecting gutter maintenance can lead to clogs, leaks, and other issues that could cause damage to your home. Here are some tips for maintaining your gutters:
1. Clean Your Gutters: Regularly remove debris such as leaves and twigs from the gutters using a scoop or trowel.
2. Check for Leaks: Inspect the seams of the gutter system for any signs of leaks or rust.
3. Repair Damage Promptly: If you notice any damage such as cracks or holes in the gutter system, repair them promptly before they worsen.
4. Trim Overhanging Branches: Cut back tree branches that overhang onto your roof so that falling leaves don’t accumulate in your gutters.
5. Install Gutter Guards: Consider installing a leaf guard system over top of your existing gutters which will prevent debris from accumulating inside while still allowing water through.
Hiring a Professional Installer
If you’re not comfortable working at heights or don’t have experience with roofing projects, it may be best to hire a professional installer. A professional will have the necessary tools and expertise to ensure that your gutter system is installed correctly and efficiently.
When hiring an installer, make sure they are licensed and insured. Ask for references from previous clients so that you can verify their work quality before hiring them.
Get multiple quotes from different installers to compare prices and services offered.
Hiring a professional installer may cost more than doing it yourself but remember that investing in proper installation now could save you money in repairs down the line if something goes wrong due to improper installation techniques or materials used.
Ultimately whether you decide on DIY or hiring an expert depends on your level of comfort with home improvement projects like this one; however either way by following our guide above should help ensure success!
FAQ
Can you attach gutters to a metal roof?
Yes, gutters can be installed on metal roofs by attaching them to the fascia board with brackets or spikes and ferrules.
Do you need different gutters with a metal roof?
With a metal roof, different gutters may not be necessary as metal roofs are highly durable and can withstand the damage gutters aim to prevent.
What goes on first gutters or metal roof?
A new metal roof usually goes on first before gutters in exterior remodeling projects.
How much overhang do you need for metal roof gutters?
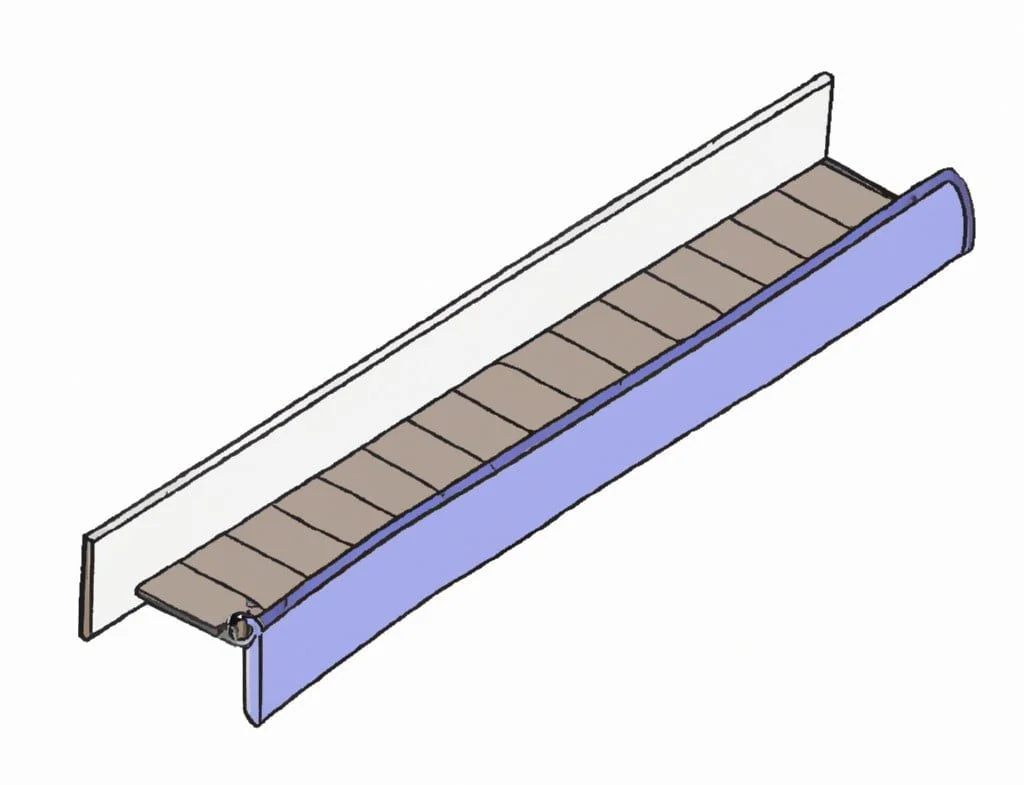
The panels at the eave side of the roof should overhang into the gutters 1 to 1-1/2 inches, but if it’s a non-gutter application, you can overhang the panel up to 3 inches.
What type of gutter brackets are best suited for metal roofs?
For metal roofs, adjustable gutter brackets are best suited.
Are there specific materials recommended for gutters on metal roofs to avoid corrosion?
To avoid corrosion on metal roofs, it is recommended to use gutters made from aluminum, copper, or stainless steel.
How should the gutter slope be adjusted for optimal water drainage on a metal roof?
To ensure optimal water drainage on a metal roof, the gutter slope should be adjusted so that it has a minimum pitch of 1/4 inch per 10 feet of horizontal run.


